Prerequisites
- Apache Kafka 3.2 or later installed in your environment
- (Optional) Confluent Cloud account if deploying on Confluent Cloud
Features
- Append-only writes with at-least-once delivery semantics
- Schema Registry support for Kafka message values
- Developed and maintained by Firebolt; verified by Confluent
- Supports all Firebolt data types except STRUCT and GEOGRAPHY
Quickstart
Follow this guide to set up Firebolt Kafka Connect Sink on Confluent Cloud.Firebolt details
To connect to Firebolt you need the following information:- Service account client ID and client secret
- Database name — the database that will contain the tables populated from Kafka topics
- Engine name — the engine that will run INSERT queries
- Account name — the Firebolt account that has access to the database
Kafka details
- Topic names — the topics that will be synced to Firebolt tables
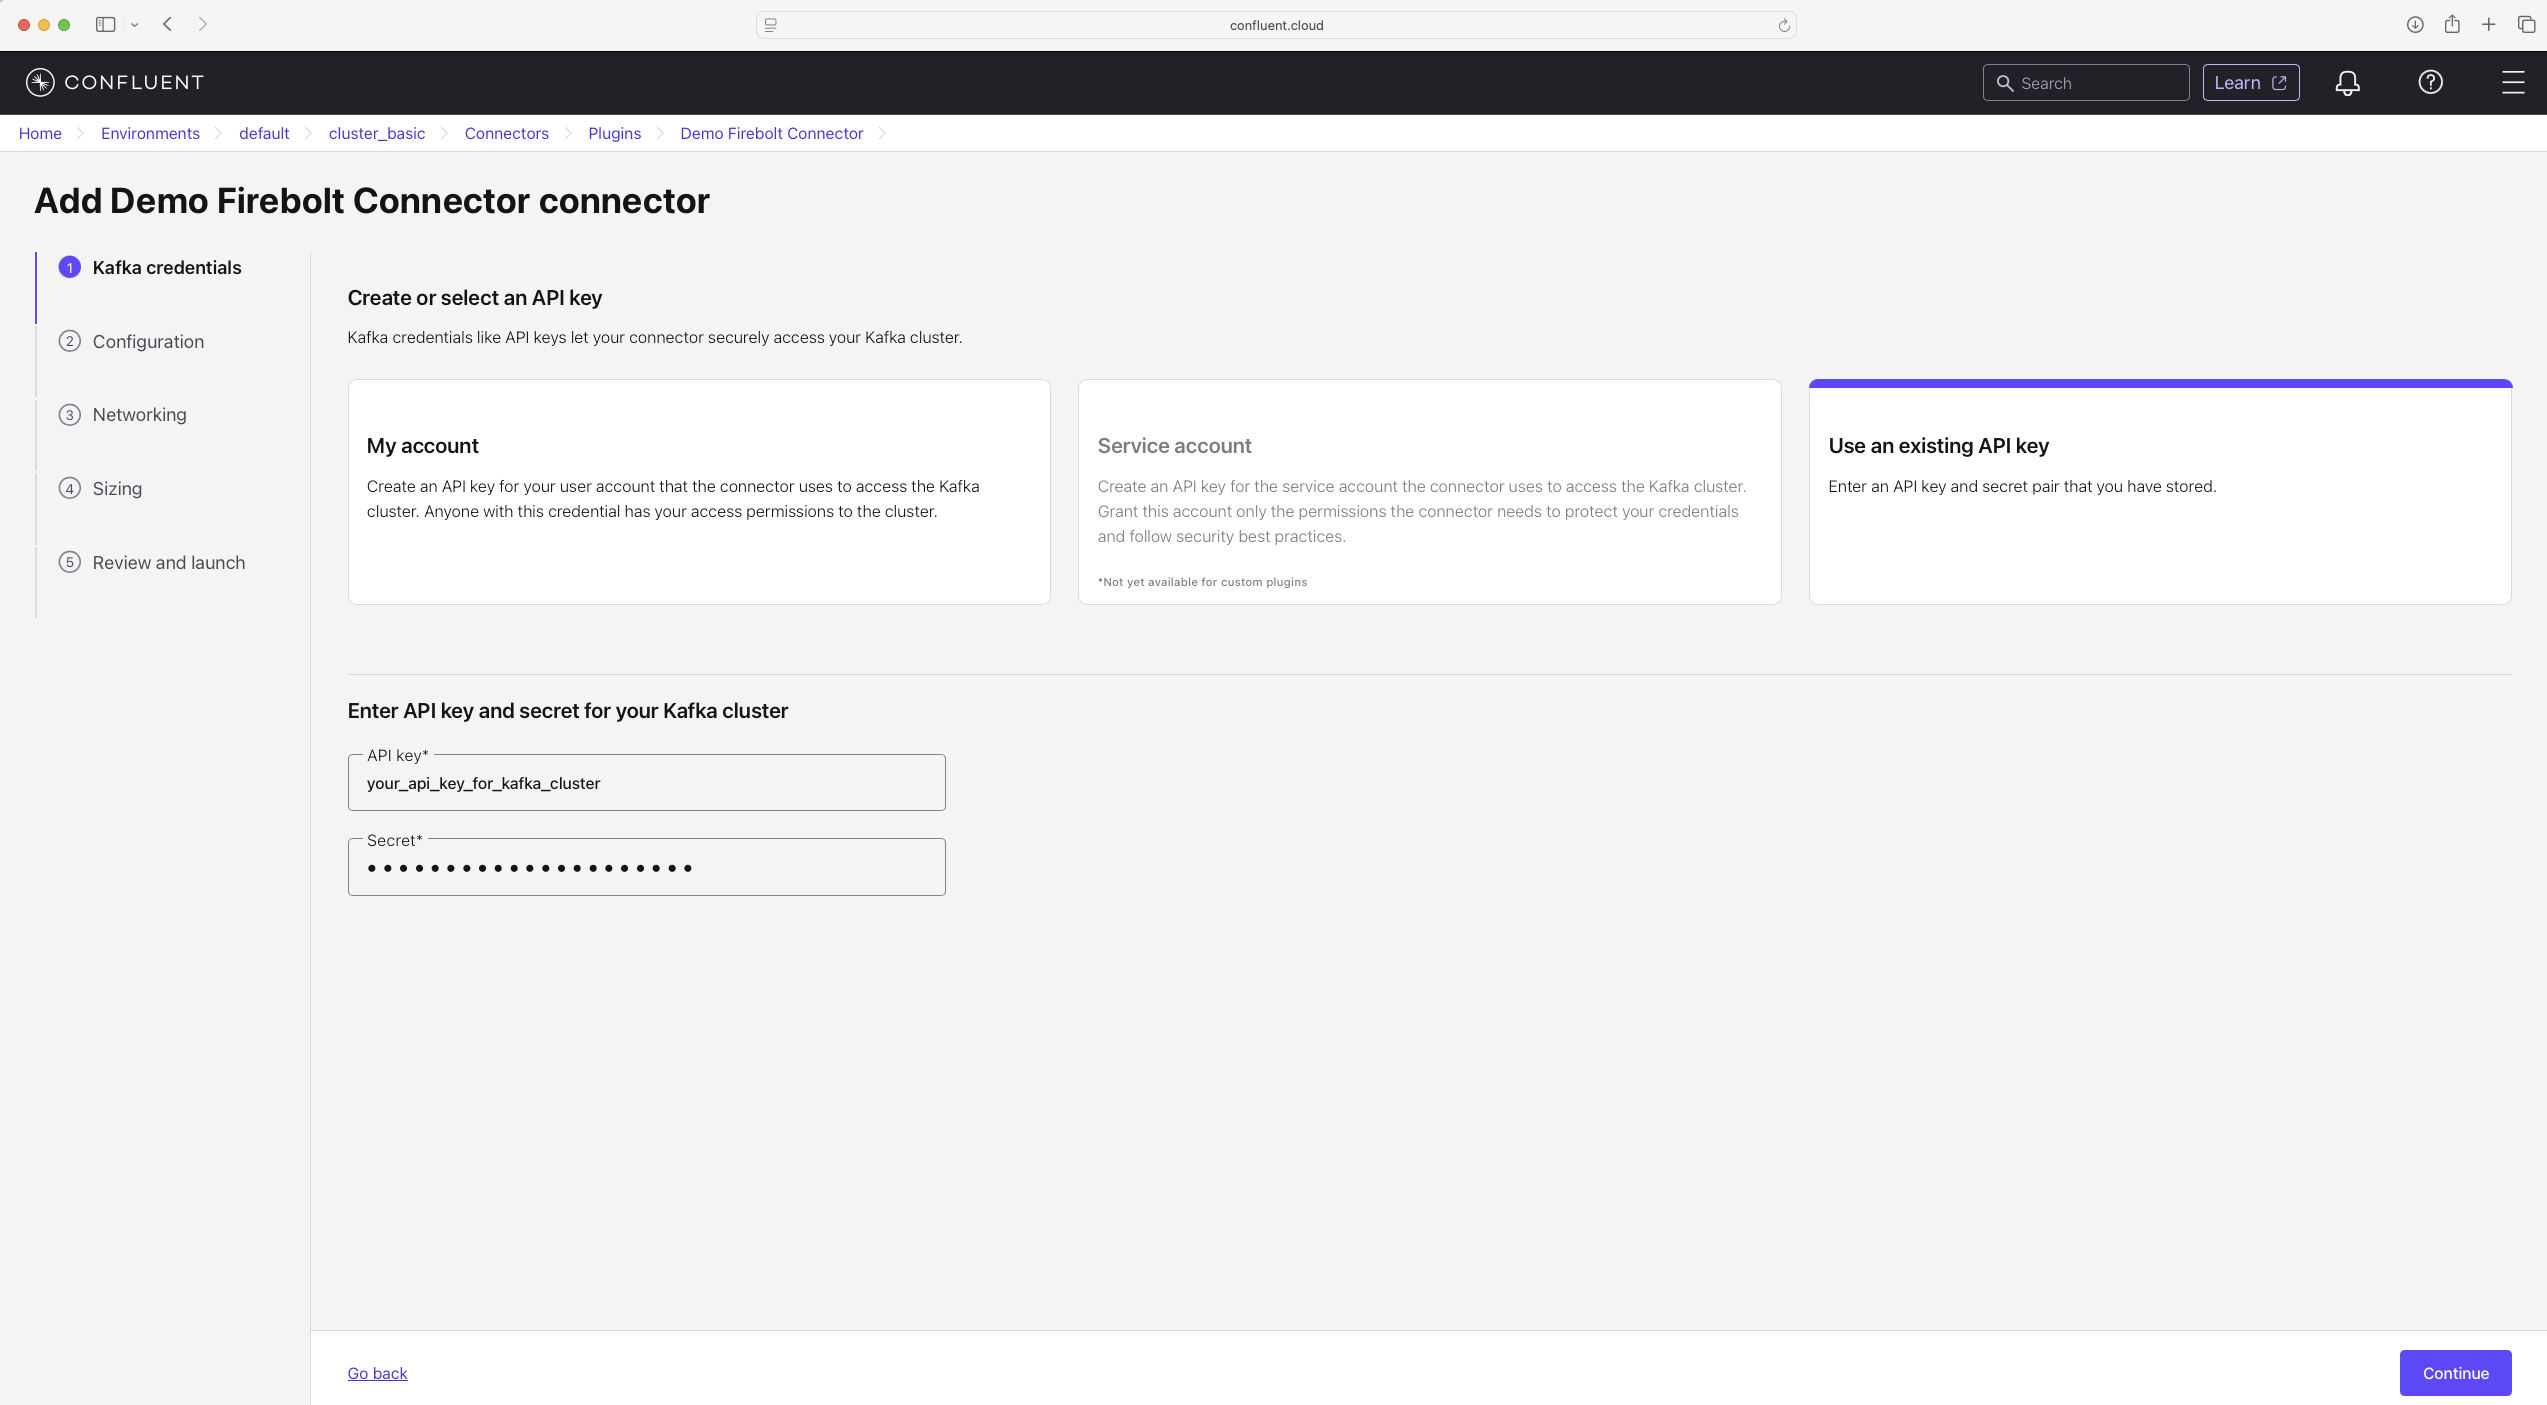
- Kafka API key and secret — when deployed on Confluent Cloud, used to authenticate to Kafka
- Schema Registry API key and secret — if using Schema Registry on Confluent Cloud, used to authenticate to Schema Registry
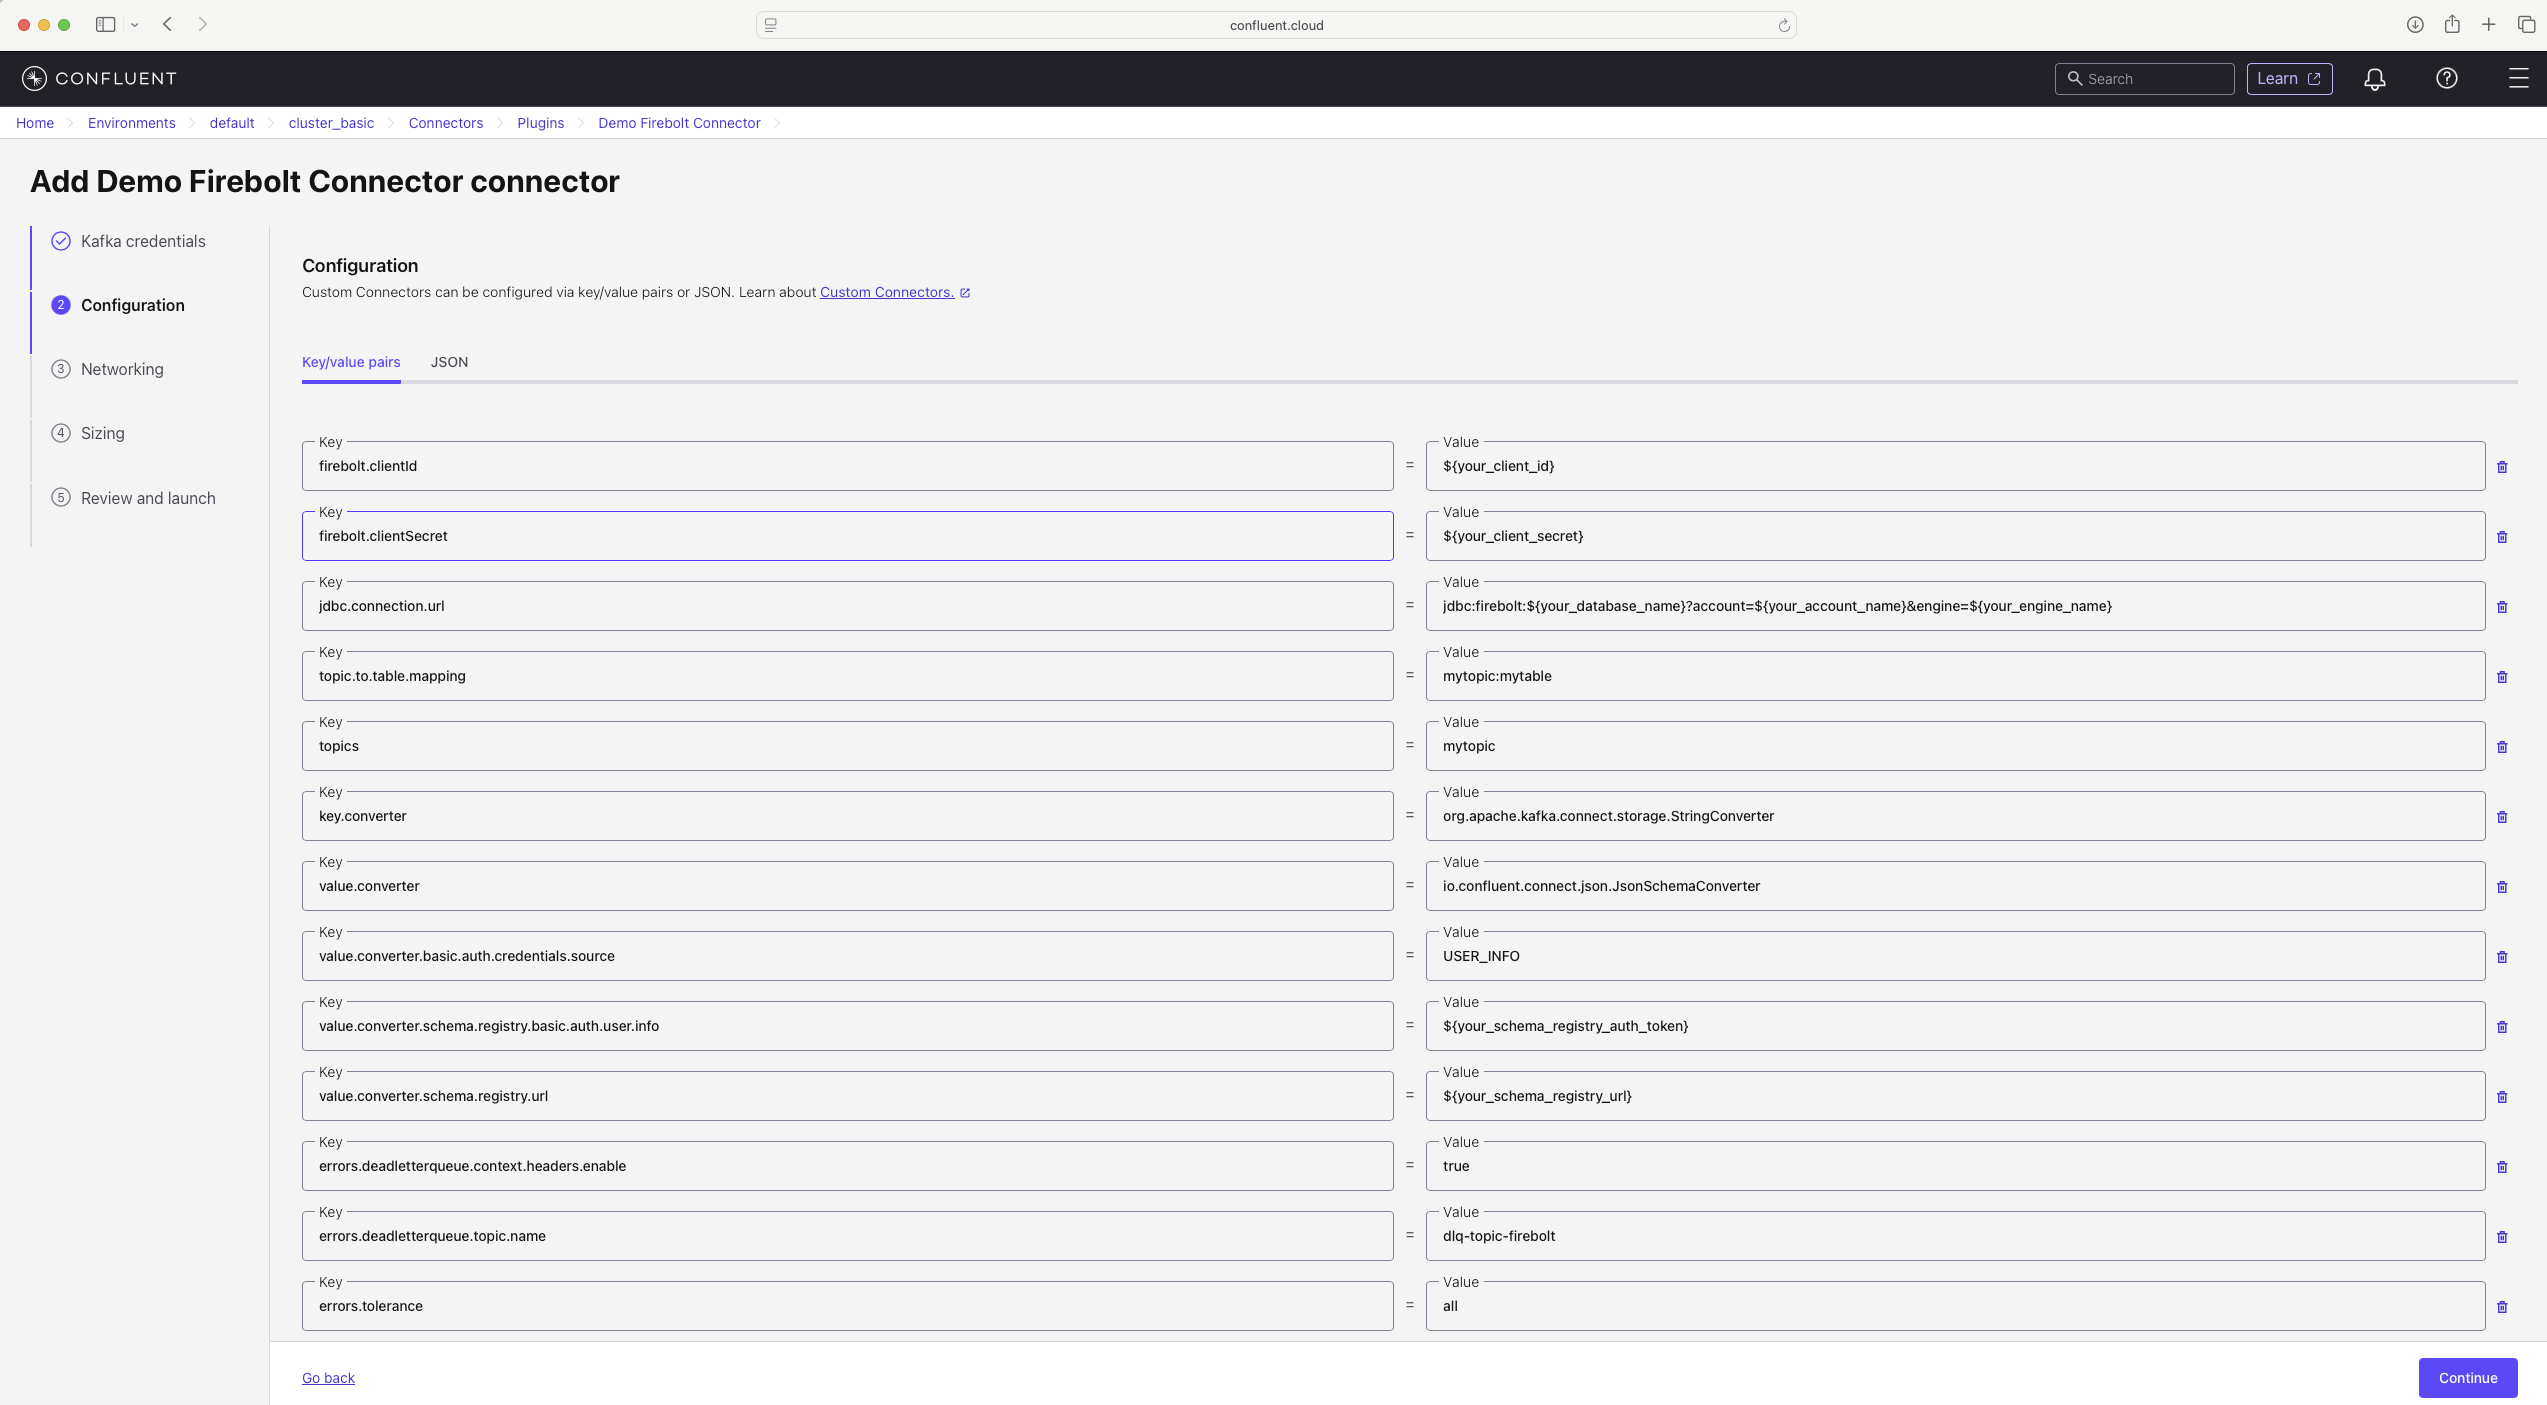
Firebolt connector configuration
- Mandatory attributes
firebolt.clientId— client ID used to authenticate to Fireboltfirebolt.clientSecret— client secret corresponding to the client IDjdbc.connection.url— JDBC connection URL used to connect to Firebolt. It must include the database name, account name, and engine name.Do not put the client ID and client secret in the JDBC connection URL; this attribute is not obfuscated when the connector definition is displayed.topics— comma-delimited list of topics the connector listens to (for example:mytopic1,mytopic2,mytopic3)value.converter— set toio.confluent.connect.json.JsonSchemaConverterkey.converter— set toorg.apache.kafka.connect.storage.StringConverter
- Optional attributes
topic.to.table.mapping— if your topic names do not match your table names, use this property to map topics to tables. It is a comma-separated list oftopic_name:table_namepairs (for example:mytopic1:mytable1,mytopic2:mytable2).value.converter.schema.registry.url— URL of your Schema Registry if used for the value schemavalue.converter.basic.auth.credentials.source— set toUSER_INFOif using API key/secret to communicate with Schema Registryvalue.converter.schema.registry.basic.auth.user.info— credentials in the formatapi_key:api_secreterrors.deadletterqueue.topic.name— dead-letter queue topic for messages that cannot be processederrors.deadletterqueue.context.headers.enable— set totrueto include failure context headers in the dead-letter queueerrors.tolerance— set toallso that Kafka messages that cannot be processed are sent to the dead-letter queue
Install Firebolt connector on Confluent Cloud
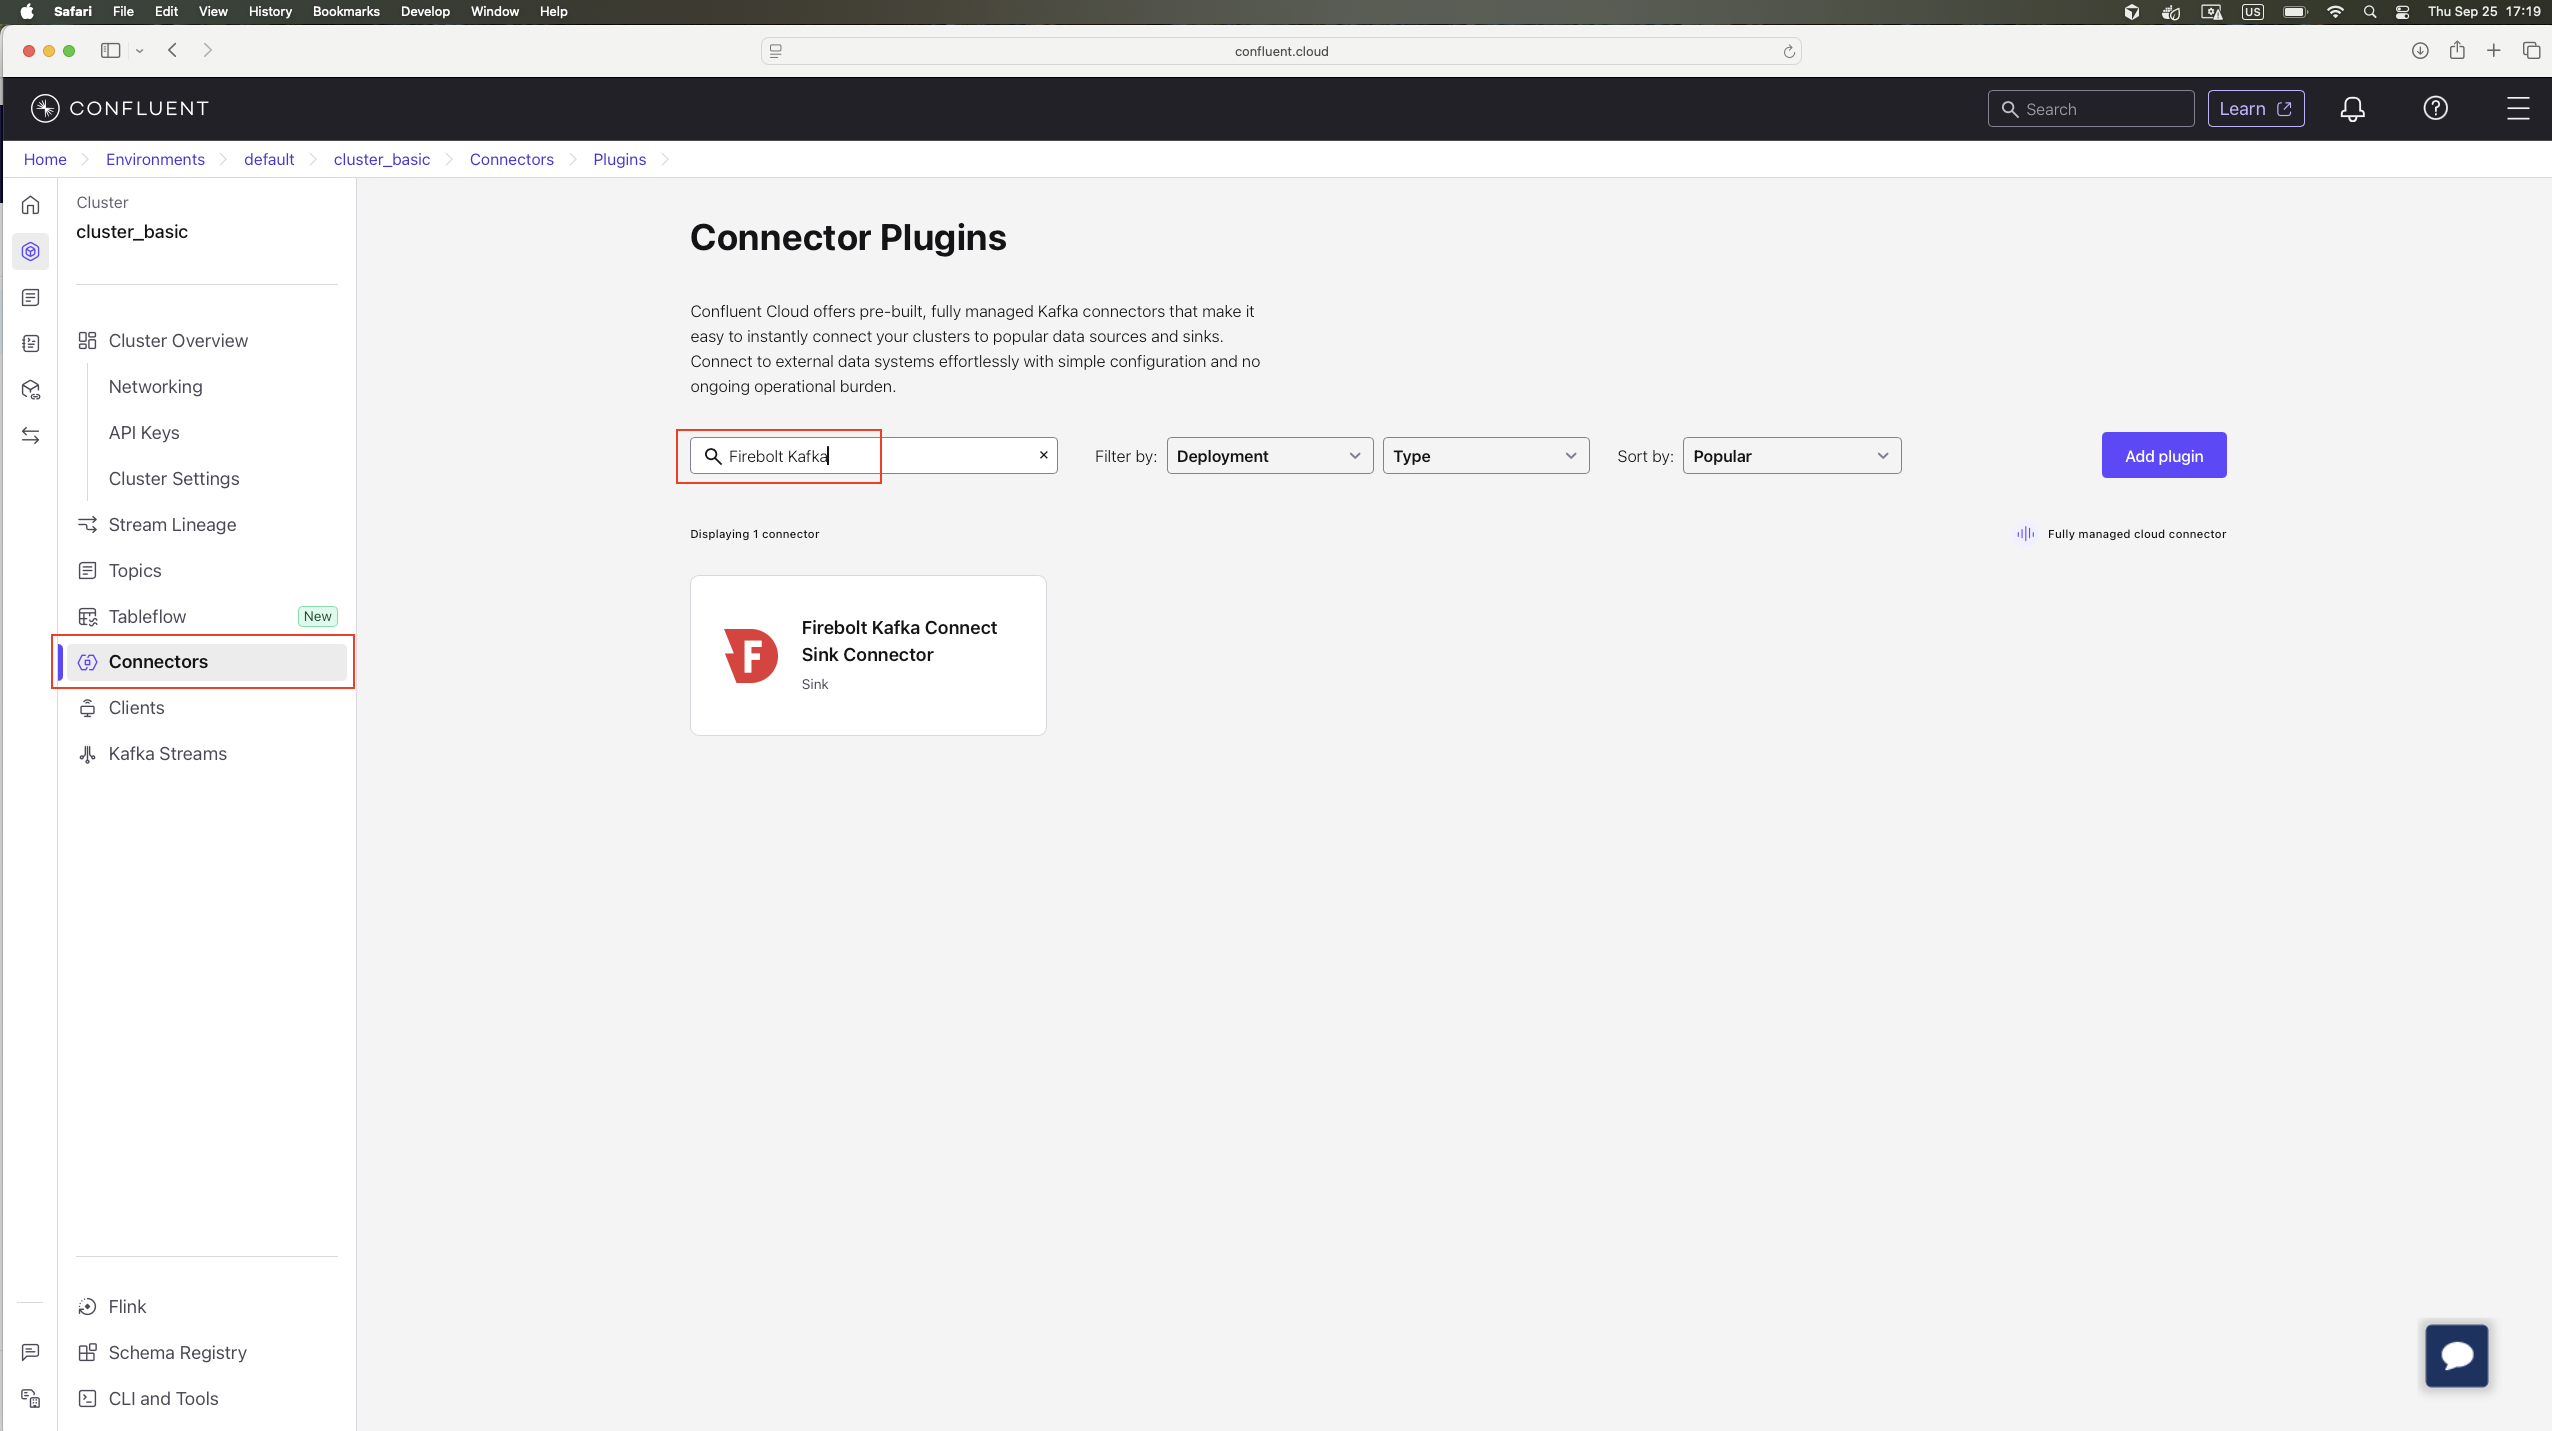
- In Confluent Cloud, navigate to the target cluster. Select Connectors in the left navigation and search for “Firebolt”.
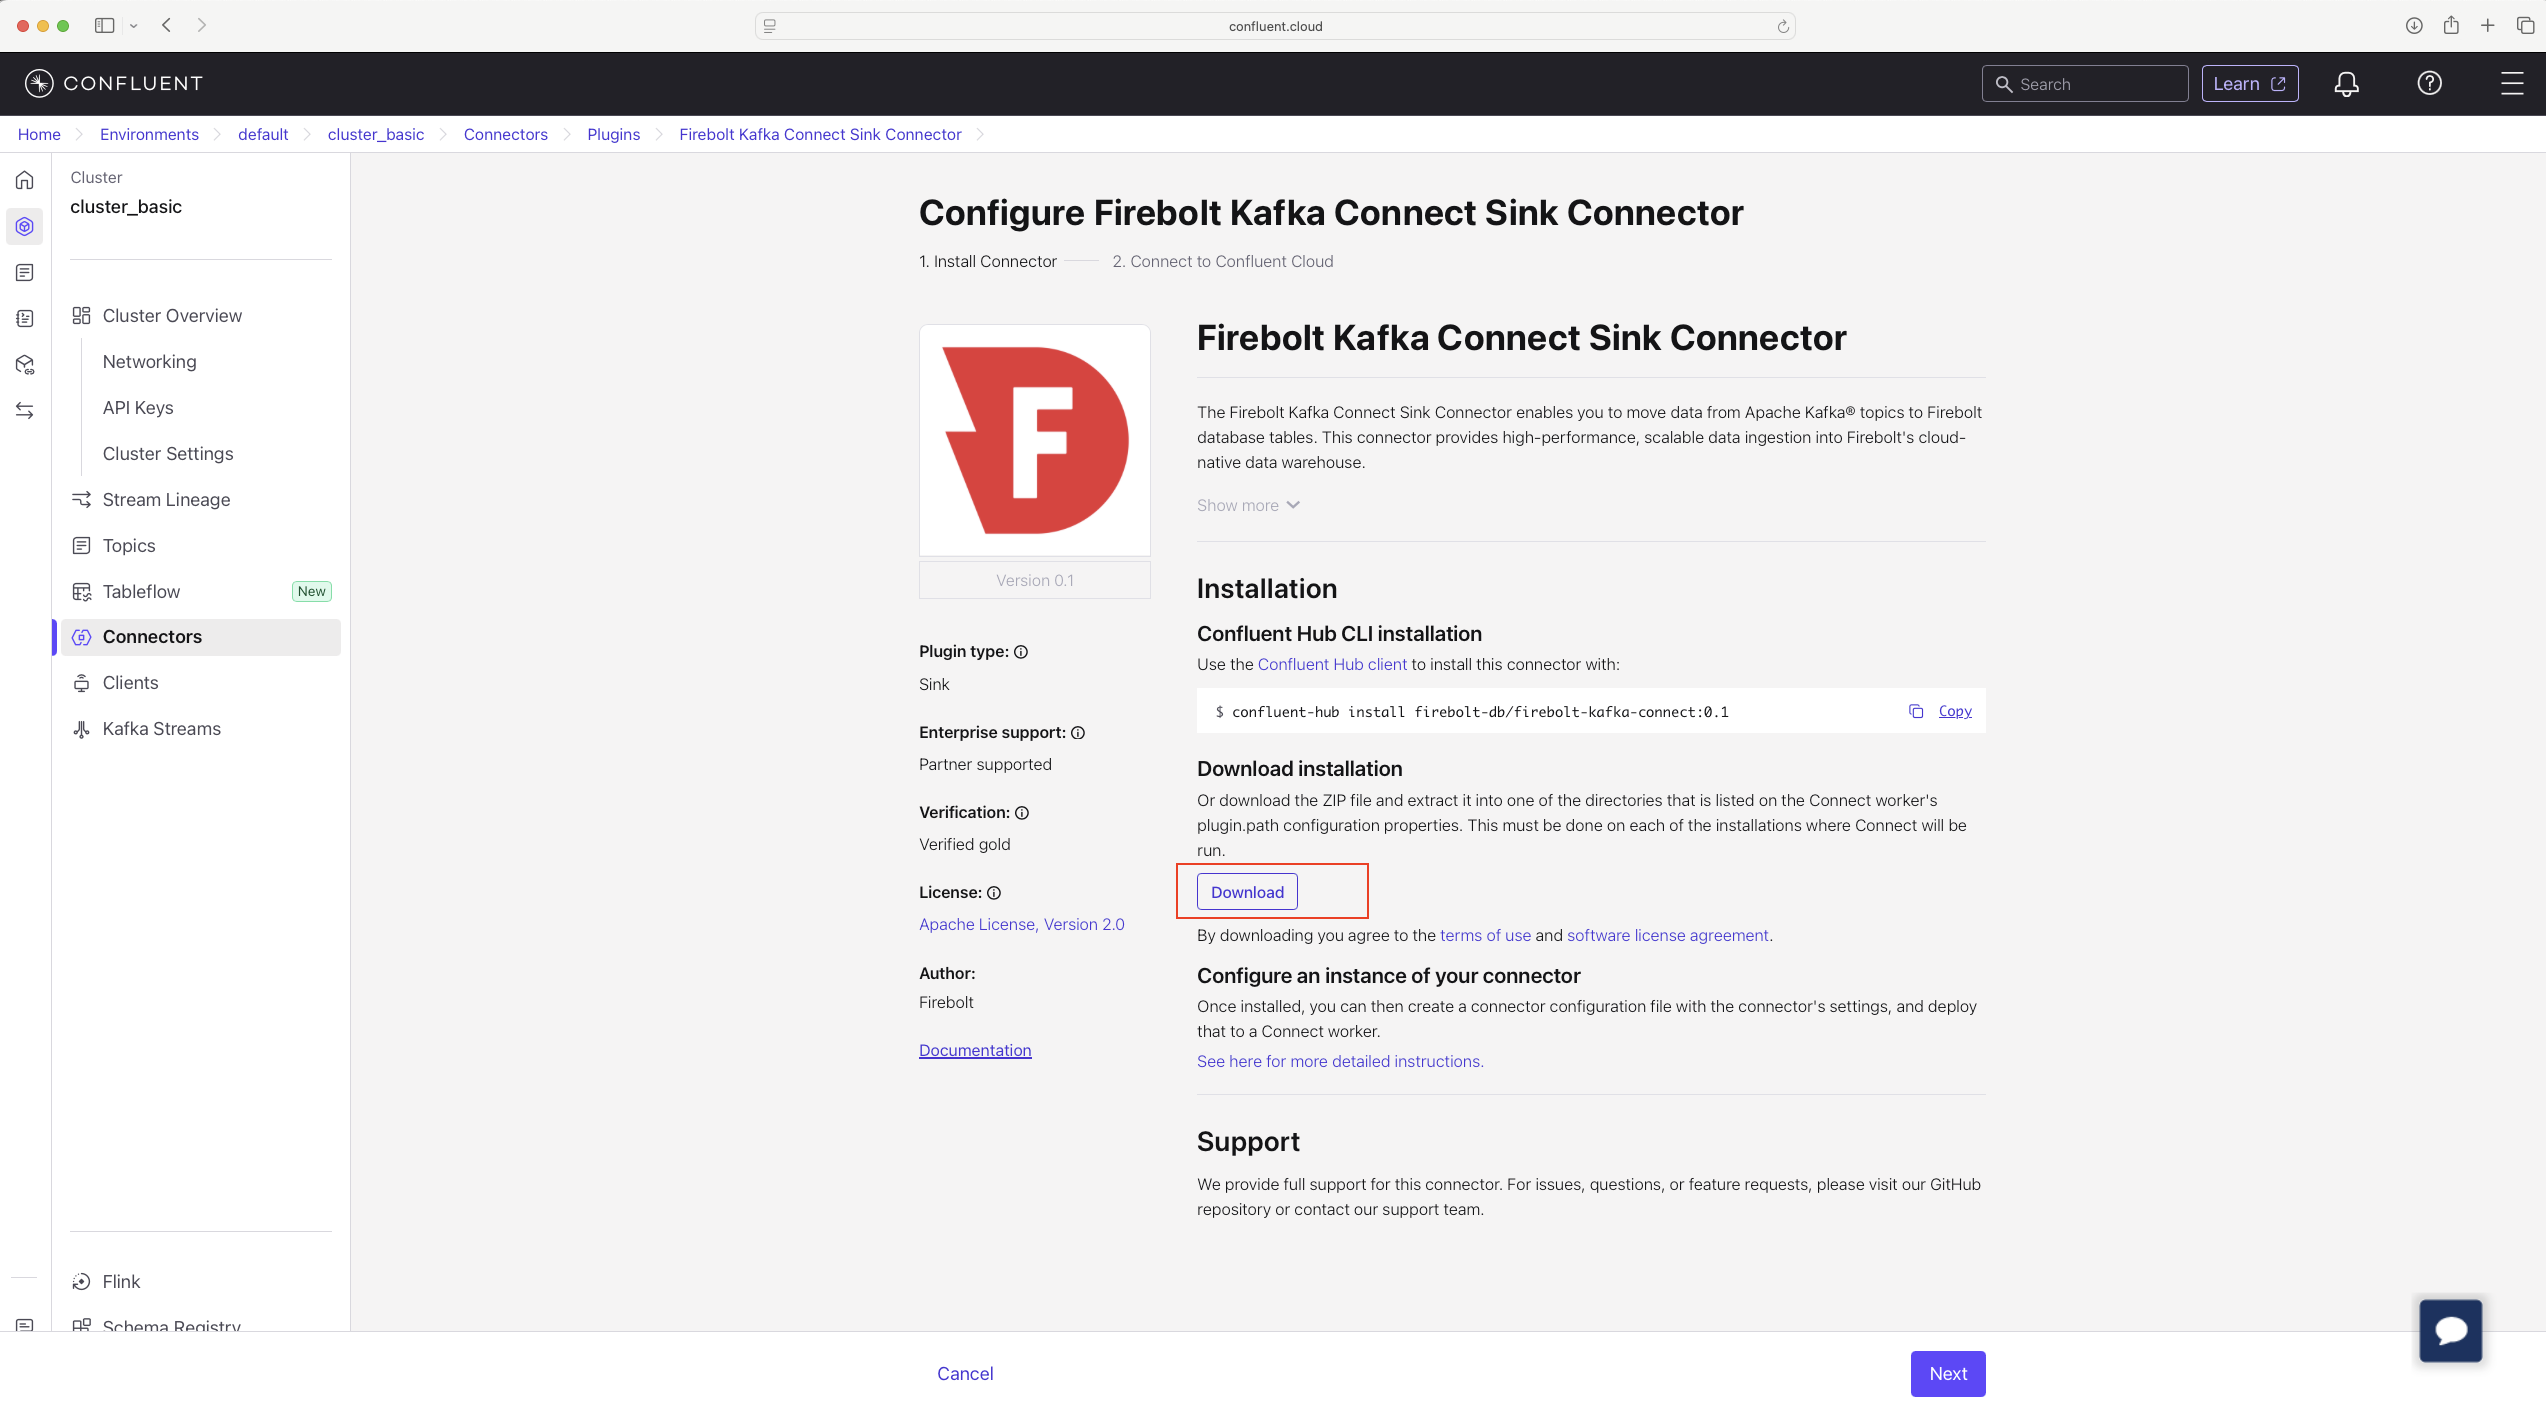
- The connector is verified by Confluent but is not managed by Confluent, so you need to download the archive.
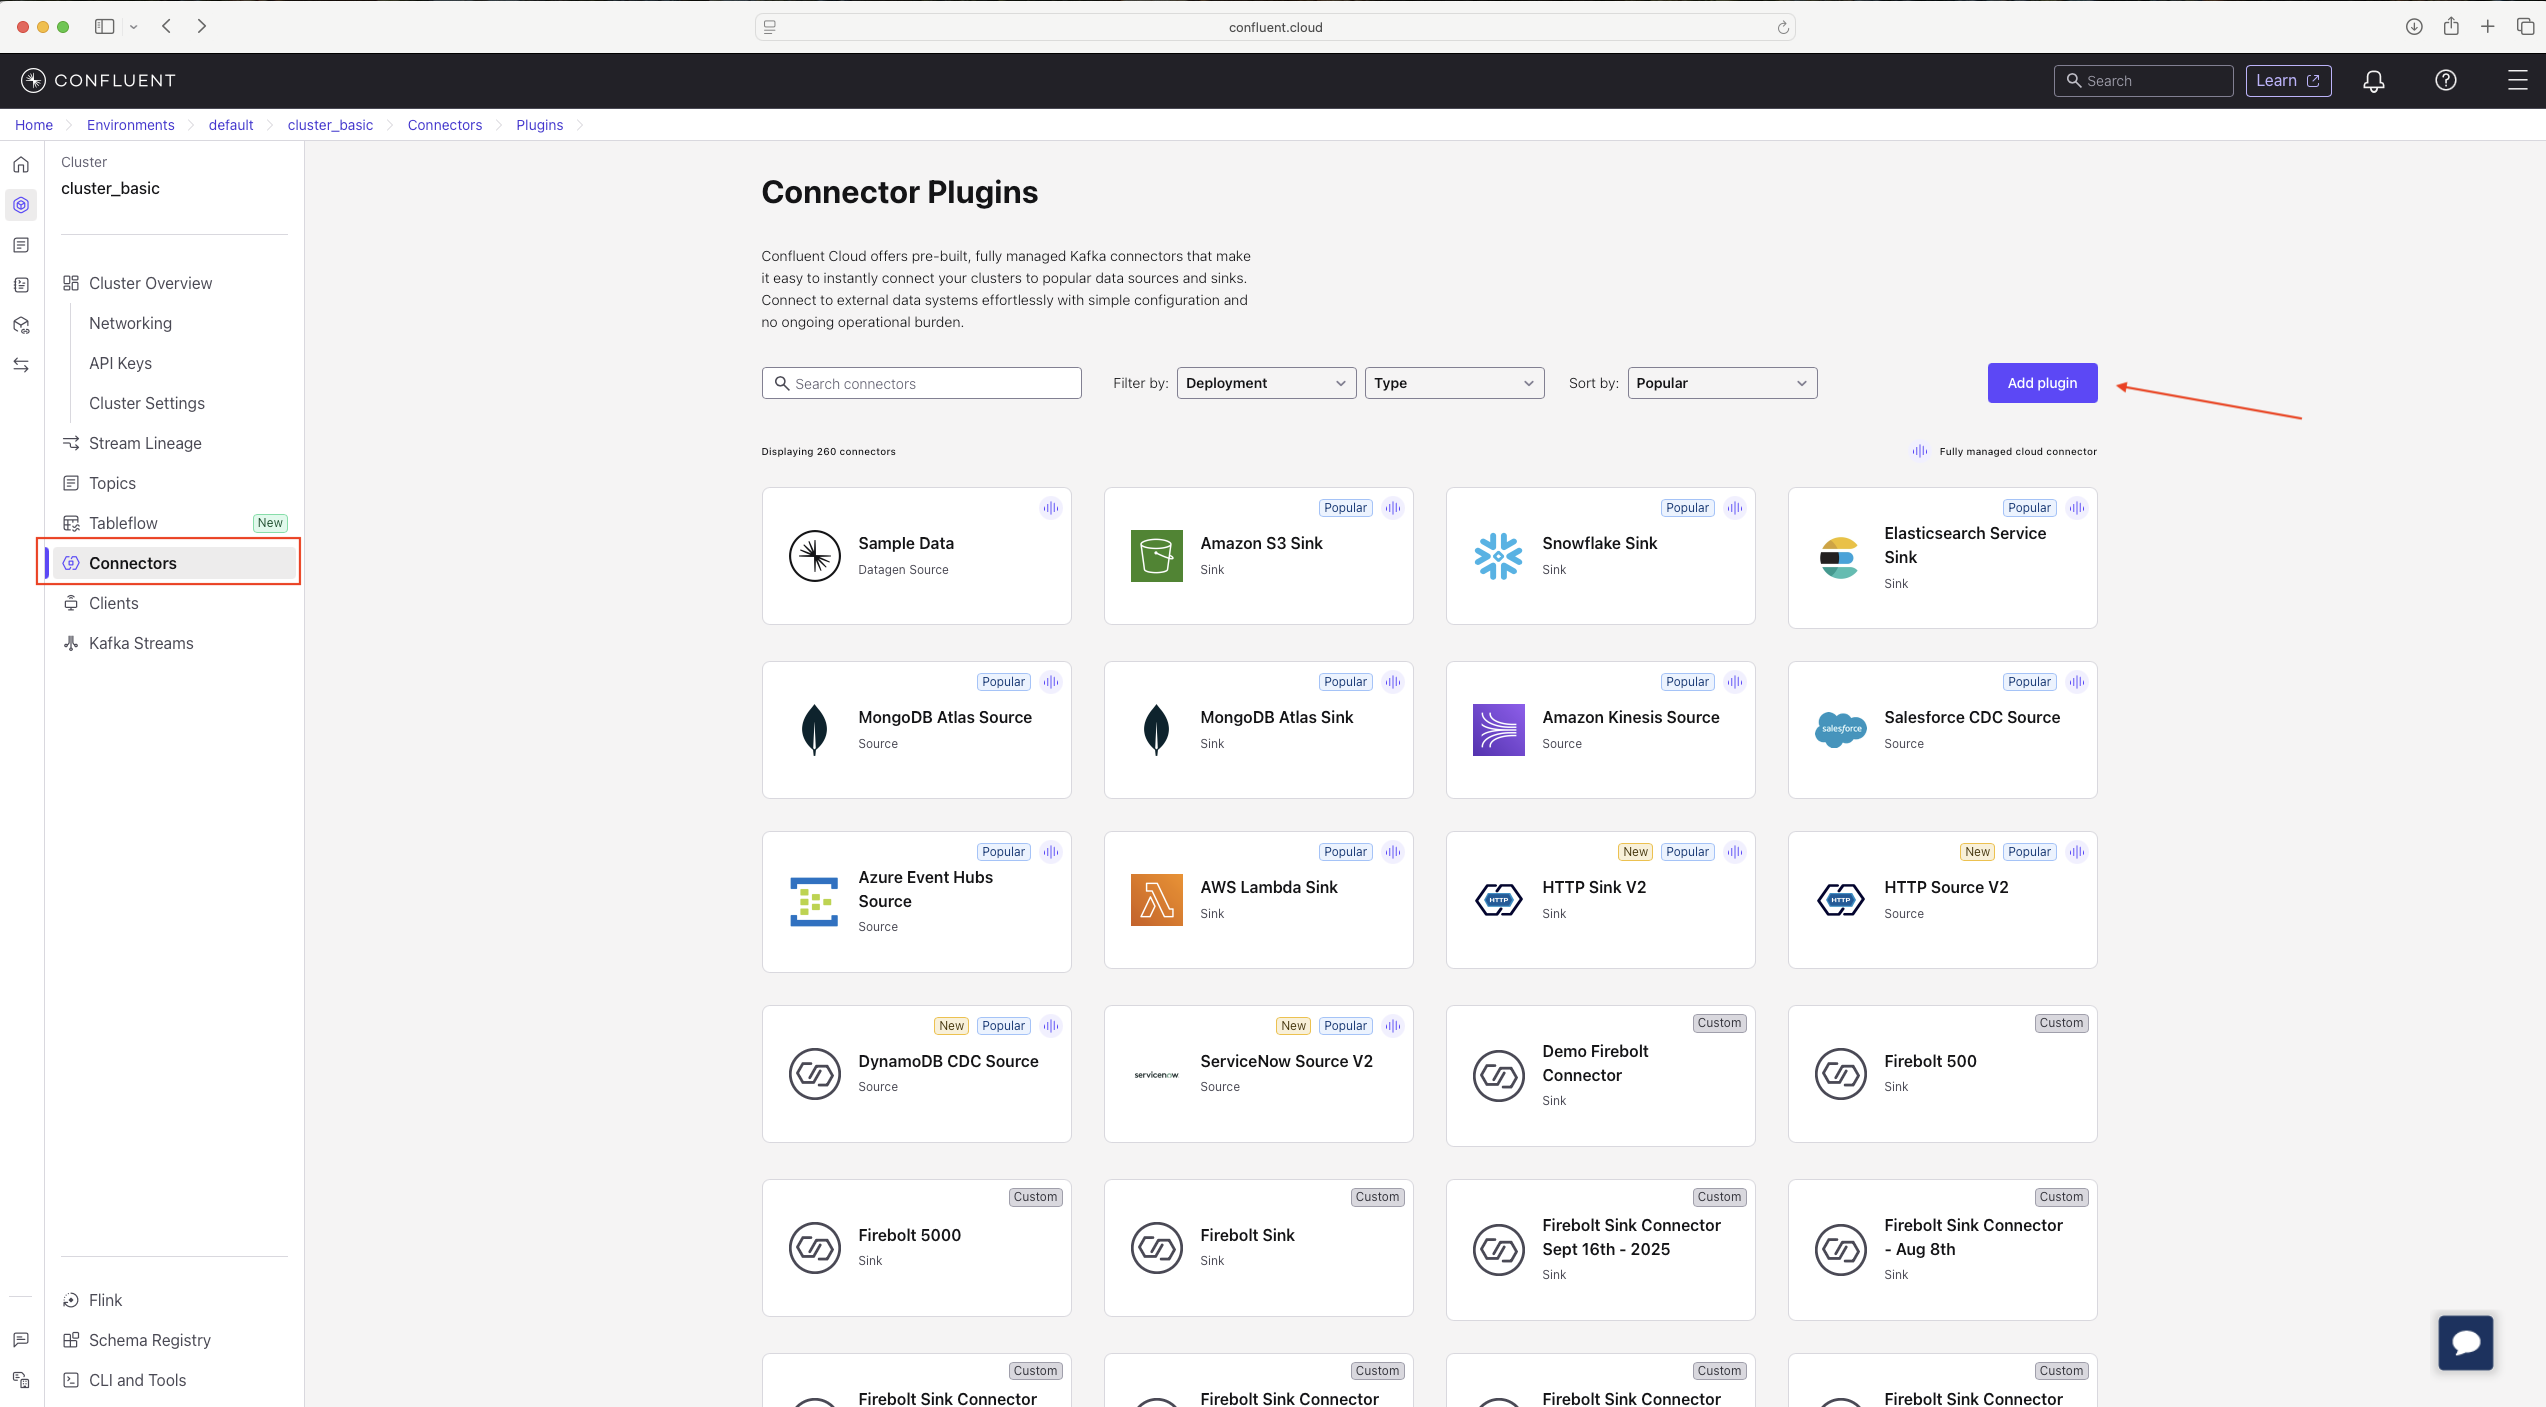
- Create a new Custom Connector using the downloaded artifact.
- Configure the Firebolt connector.
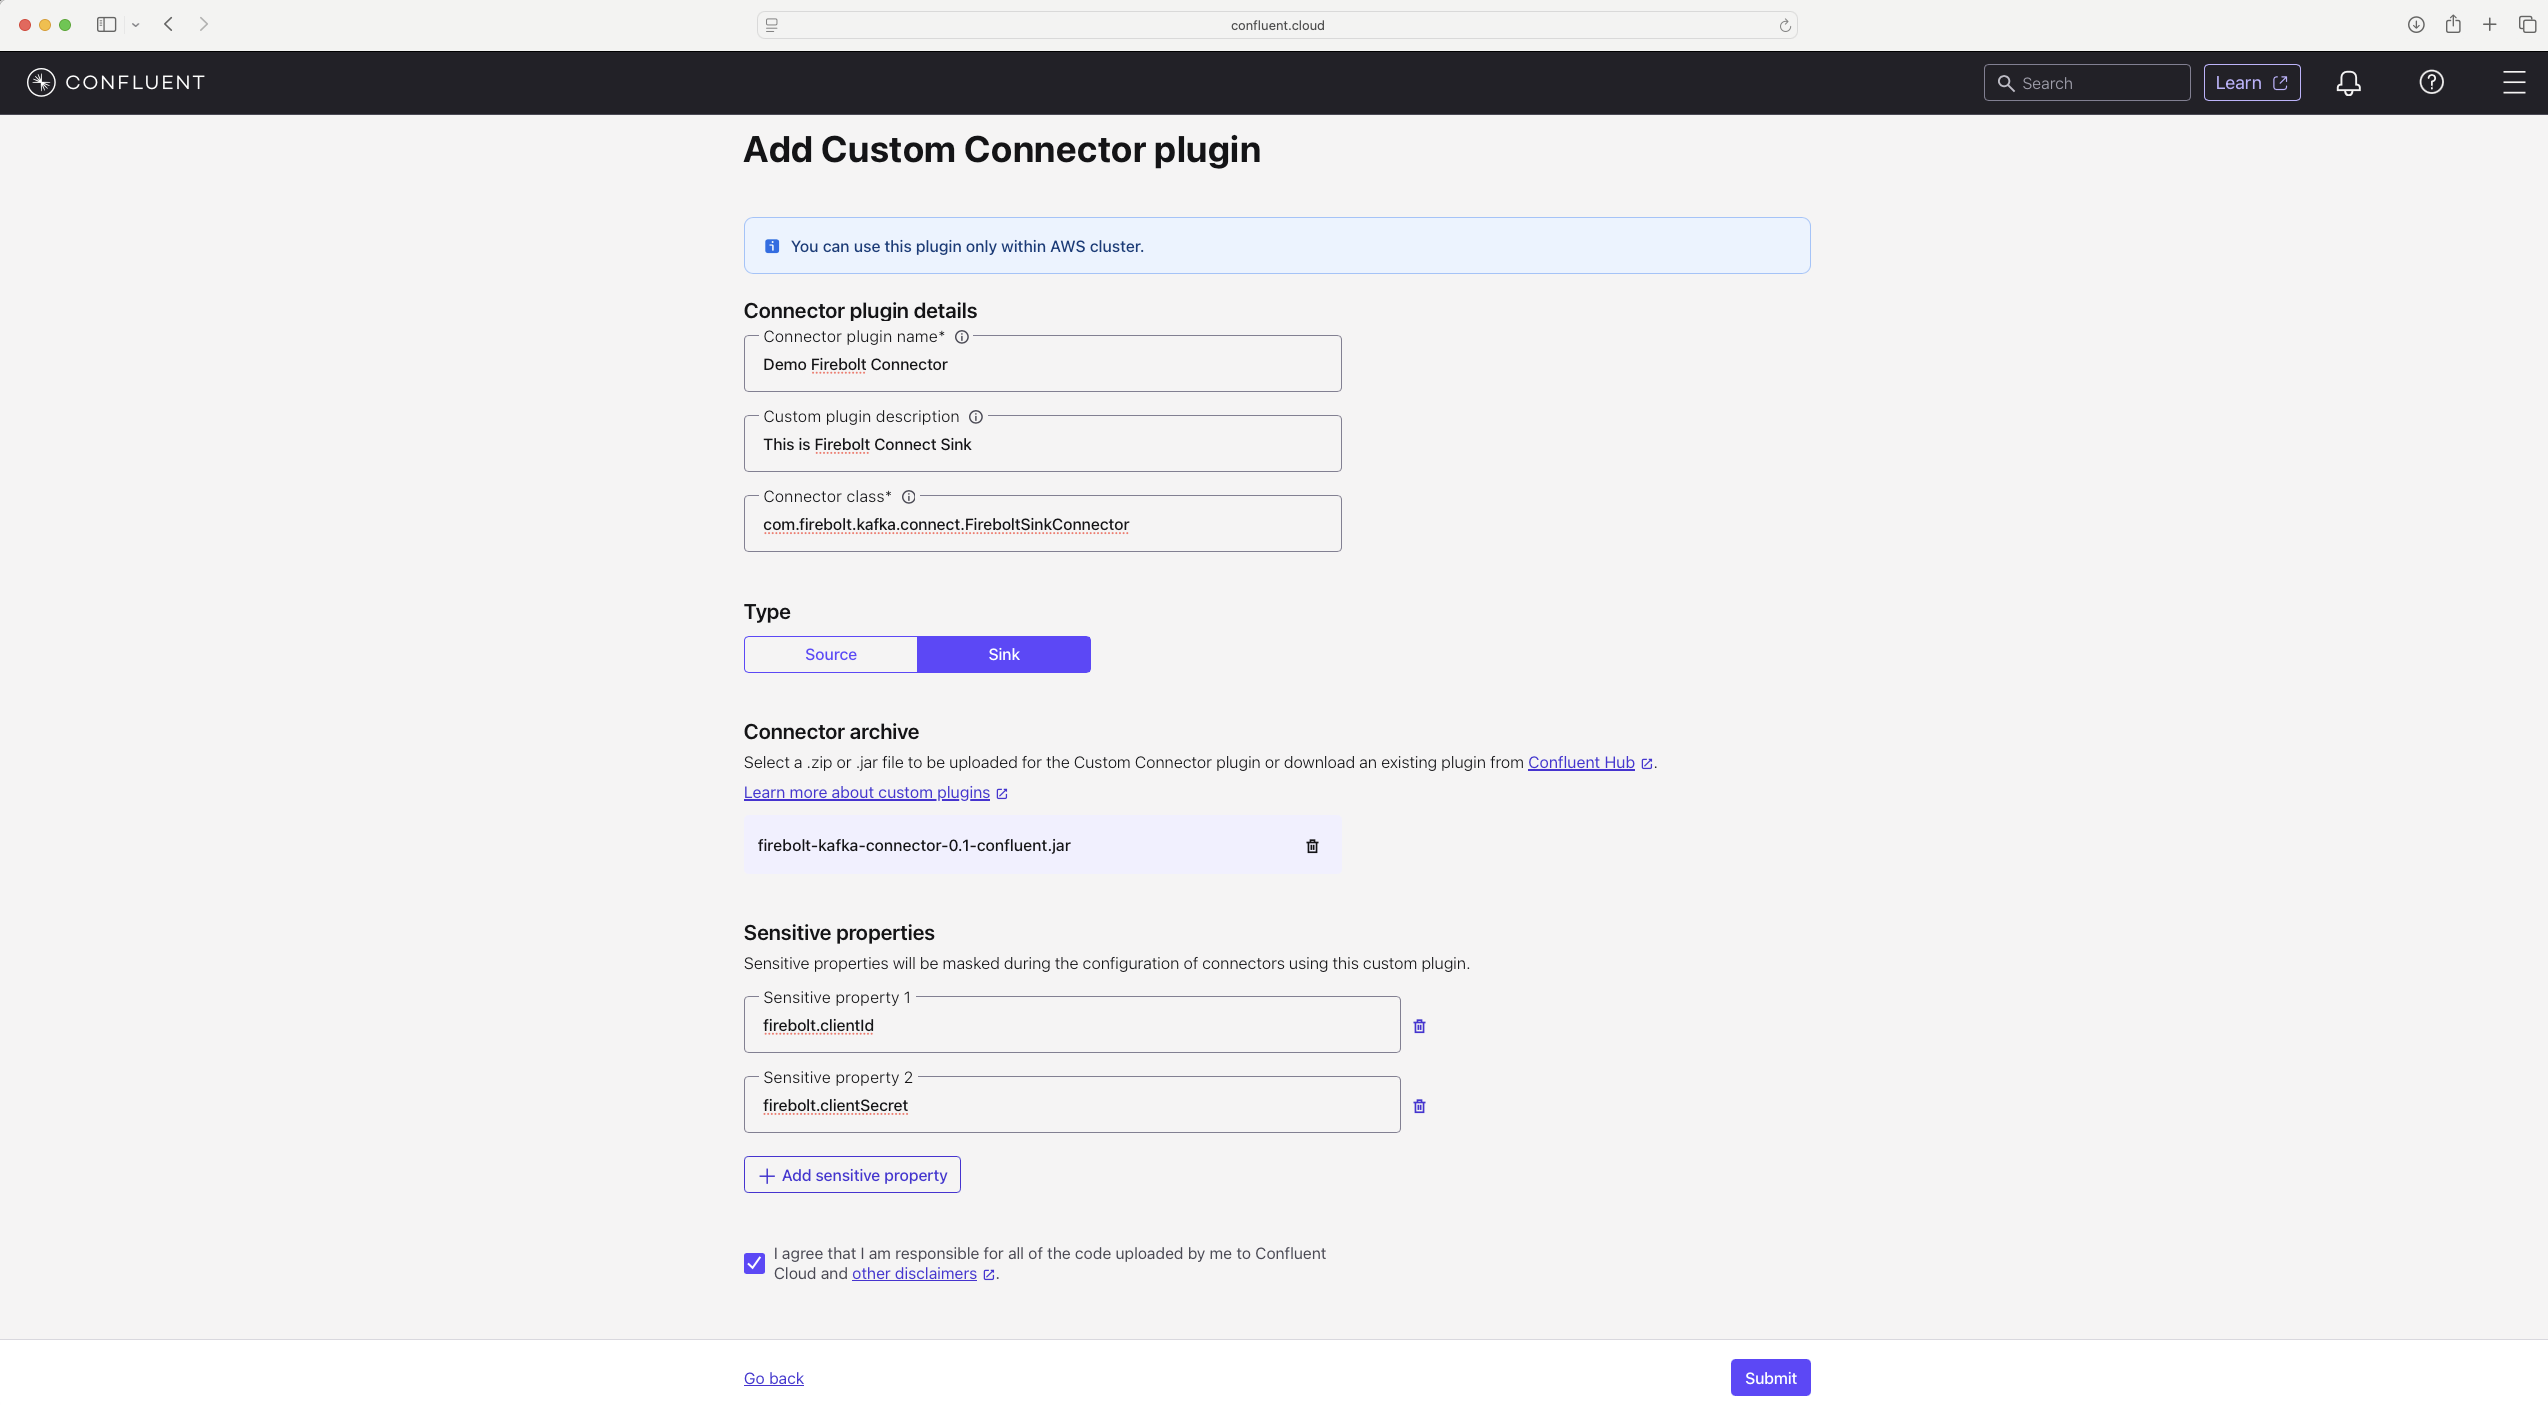
- Connector plugin name — choose a name for your connector
- Connector class —
com.firebolt.kafka.connect.FireboltSinkConnector(the custom connector class for Firebolt) - Type — select
Sink(Firebolt implements the Sink functionality) - Connector archive — select the JAR file you downloaded in step 2
- Sensitive properties — Firebolt Connect Sink has two sensitive properties (they are not shown in the UI or via REST):
firebolt.clientId— client ID used to authenticate to Fireboltfirebolt.clientSecret— client secret corresponding to the client ID
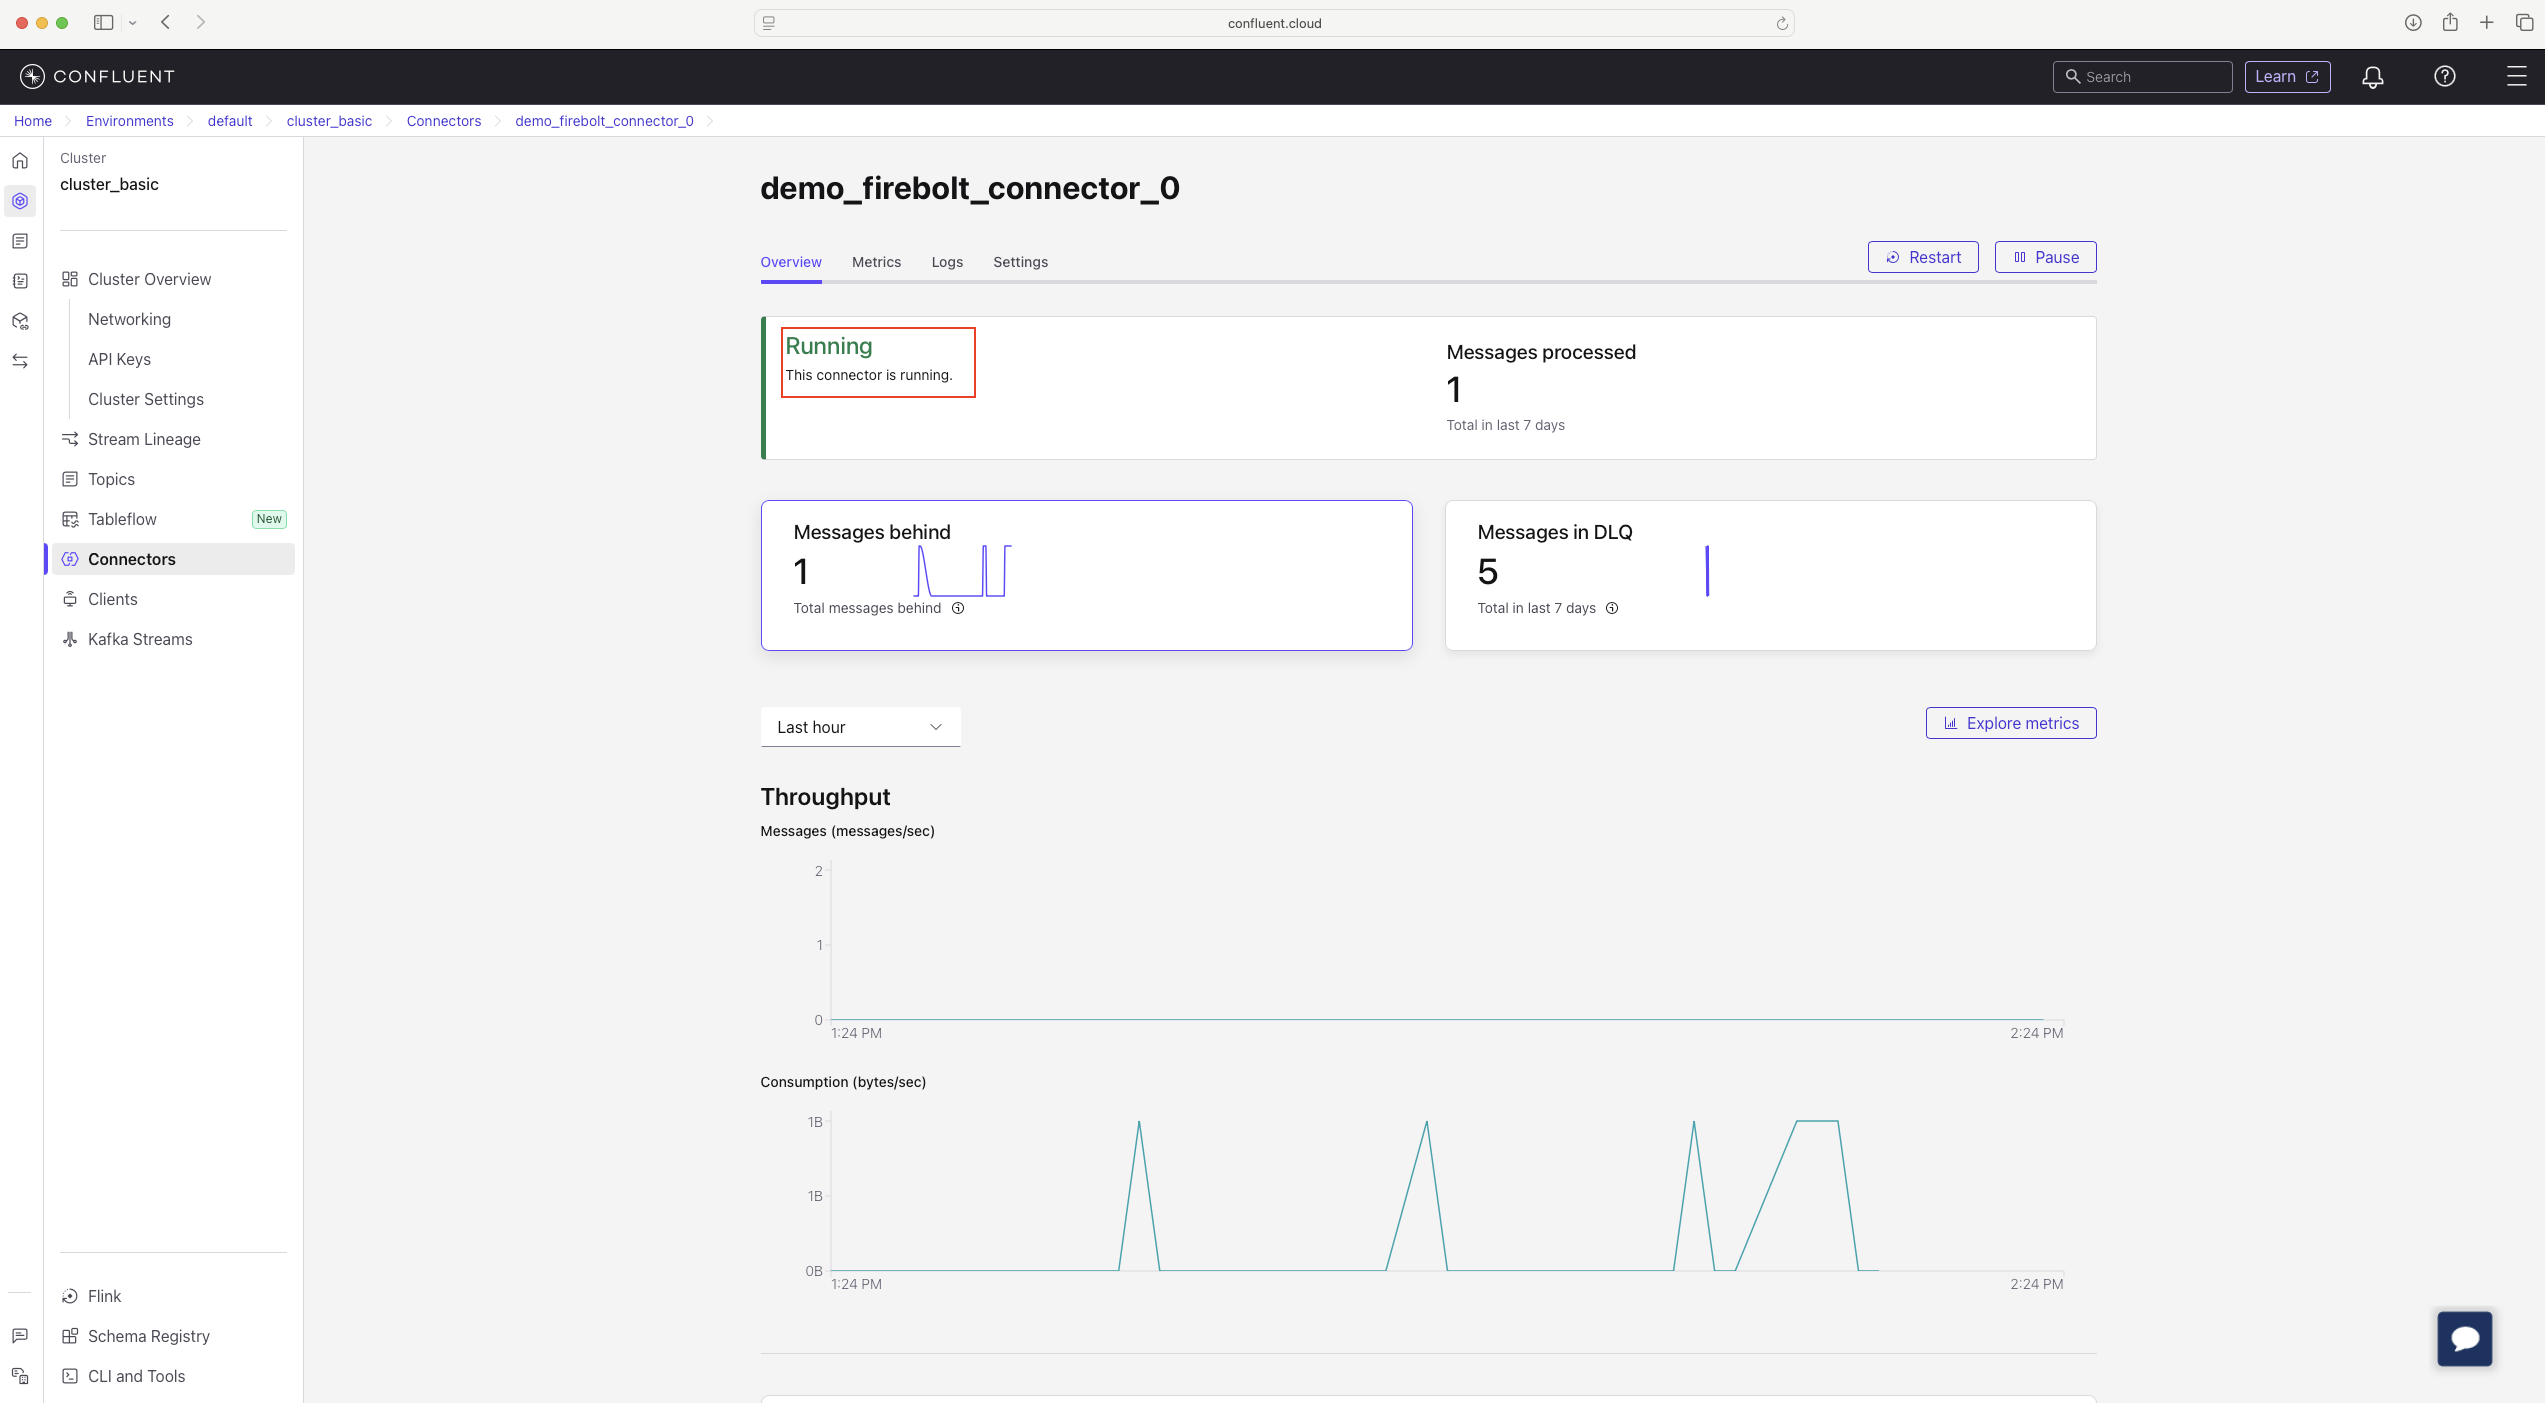
- You should now see the connector running on the Connectors page.
Troubleshoot installing Firebolt connector on Confluent Cloud
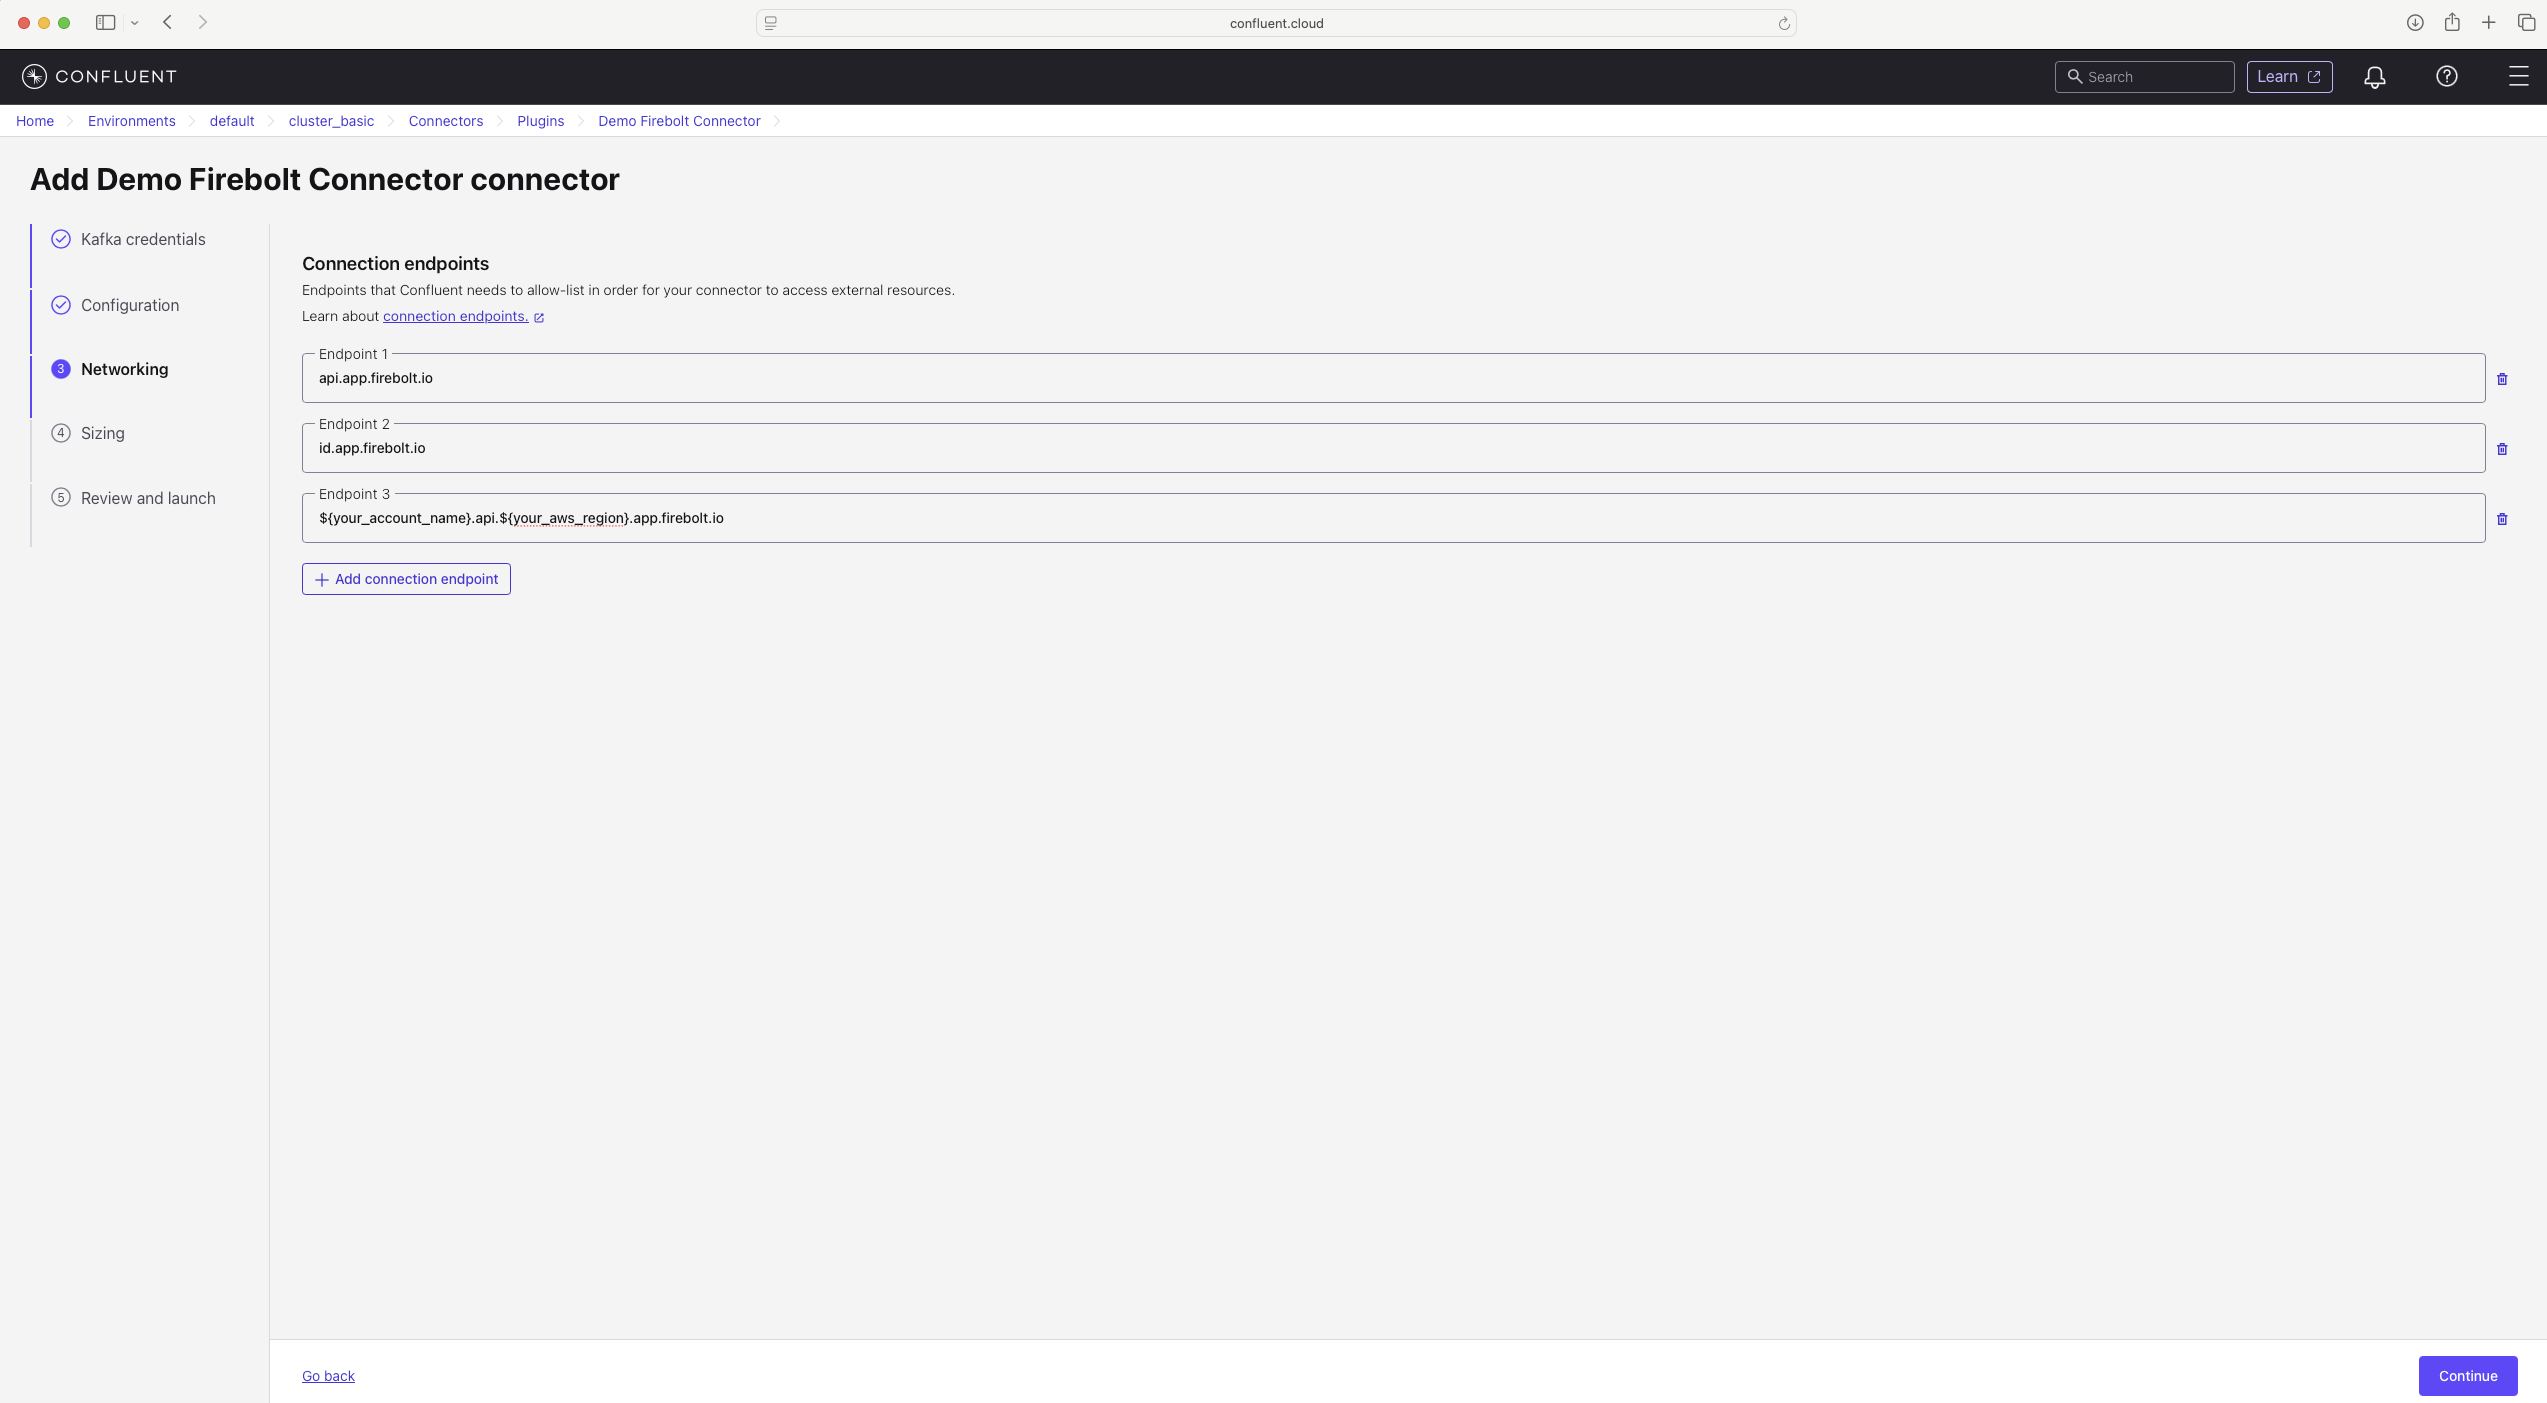
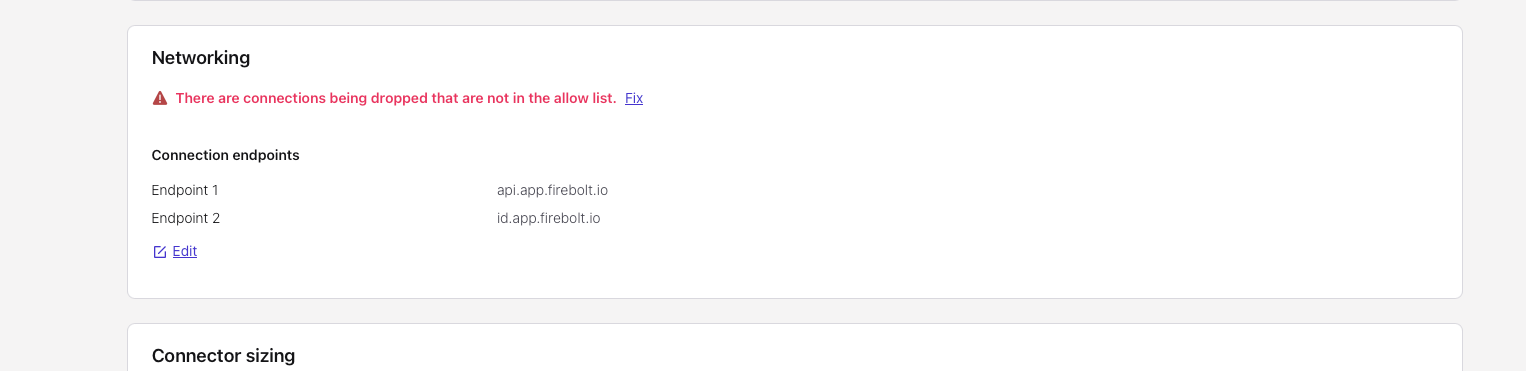
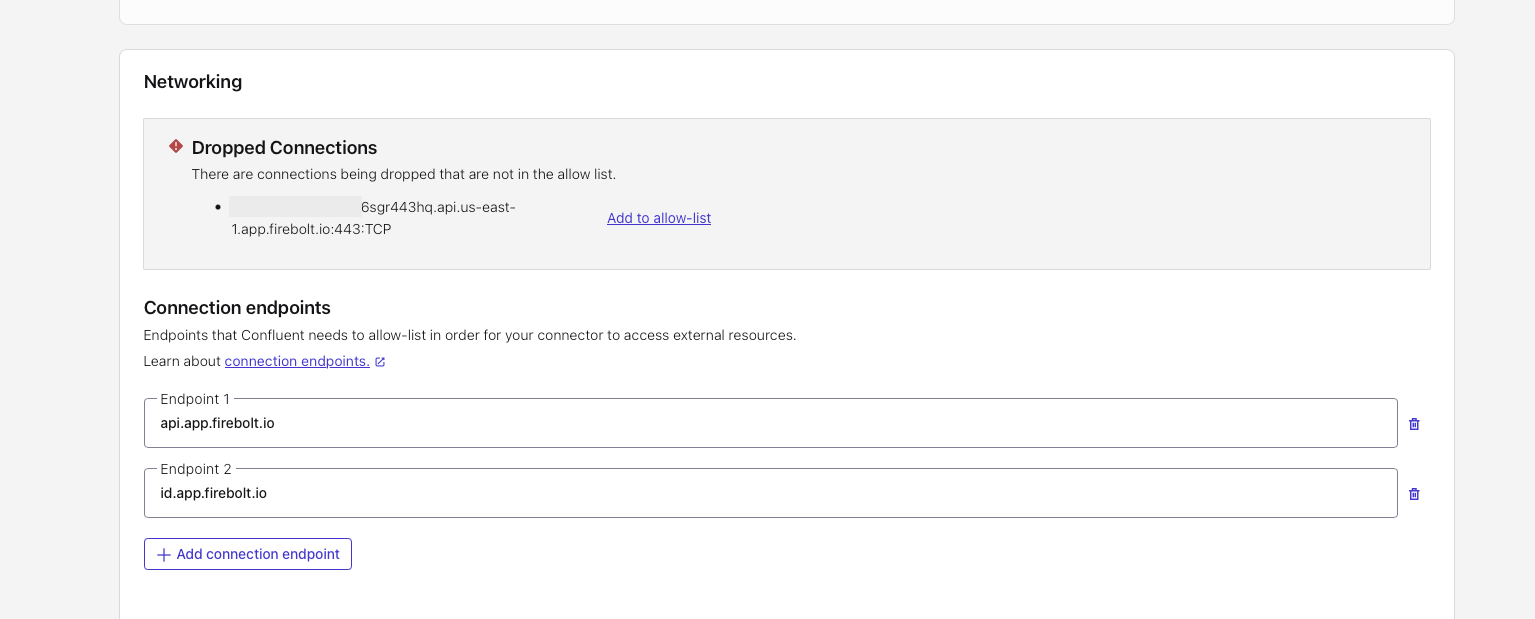
- Networking endpoints troubleshooting — The Kafka connector needs to know in advance the egress endpoints it will call so it can allowlist those IP addresses.
Set endpoints for Firebolt authentication (
id.app.firebolt.io) and Firebolt backend API calls (api.app.firebolt.io). Some endpoints are dynamic (the account URL is specific to the account in your JDBC URL). Each endpoint may be served by multiple IPs because a reverse proxy is used in front of the services.
- Log messages with request being too large
- reduce the number of messages that you ingest in a kafka batch by setting this property
consumer.override.max.poll.recordsto a smaller value - contact support@firebolt.io to request an increase in maximum payload request size
Kafka Sink connector is under development so we will be adding new features in the following versions:
- Change data capture (CDC): not currently supported
- Schema evolution: not currently supported
- Avro format and Kafka message keys with Schema Registry: not currently supported