401 Unauthorized response.
The IP allow and blocked lists used to specify a network policy are specified as comma-separated IPv4 addresses and/or IPv4 address ranges in CIDR format. You can apply the same list to one or many users, and each user can have unique lists. You can specify lists manually or import lists of addresses and ranges from a CSV file saved locally. You can add, edit or delete network policies using SQL or in the UI.
To view all network policies, click Configure to open the configure space, then choose Network policies from the menu, or query the information_schema.network_policies view.
Managing network policies requires the org_admin role.
Create a network policy
SQL
To create a network policy using SQL, use the CREATE NETWORK POLICY statement. For example:UI
To create a network policy via the UI: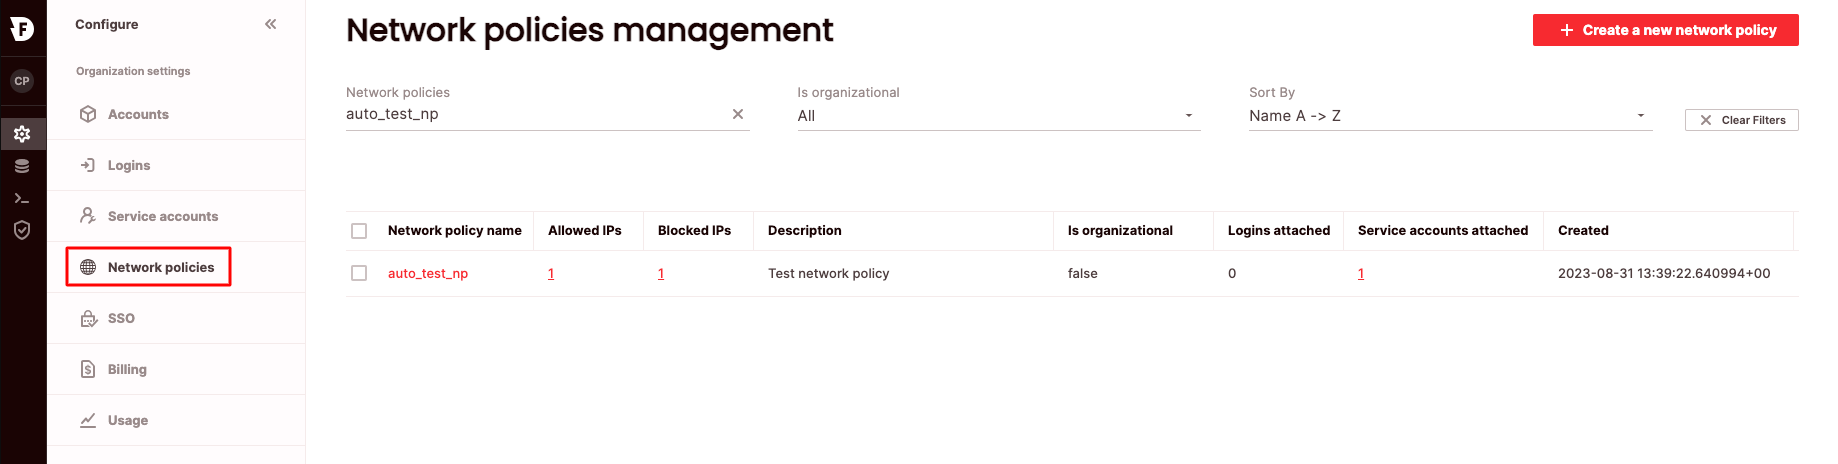
- Click Configure to open the configure space, then choose Network policies from the menu.
- From the Network policies management page, choose Create a new network policy.
- Enter a network policy name. Optionally, enter a network policy description. To add to the allow list, enter comma-separated IPv4 addresses, or IPv4 address ranges in CIDR format under Grant access from selected allowed IP addresses, or choose import file to read IP addresses from a CSV file.
- Enter addresses for the block list in the Deny access from selected blocked IP addresses.
- Choose Save.
Attach a network policy to an organization
SQL
When a network policy is created in UI, it is automatically attached to an organization the creator is logged in to. However, to attach (or detach) a network policy, you can use the command ALTER ORGANIZATION. For example:UI
To attach/detach a network policy to an organization via the UI:
- Click Configure to open the configure space, then choose Network policies from the menu.
- Search for the relevant network policy using the top search filters or by scrolling through the list.
- Switch the Is organizational toggle to on or off.
Edit a network policy
SQL
To edit a network policy using SQL, use the ALTER NETWORK POLICY statement. For example:UI
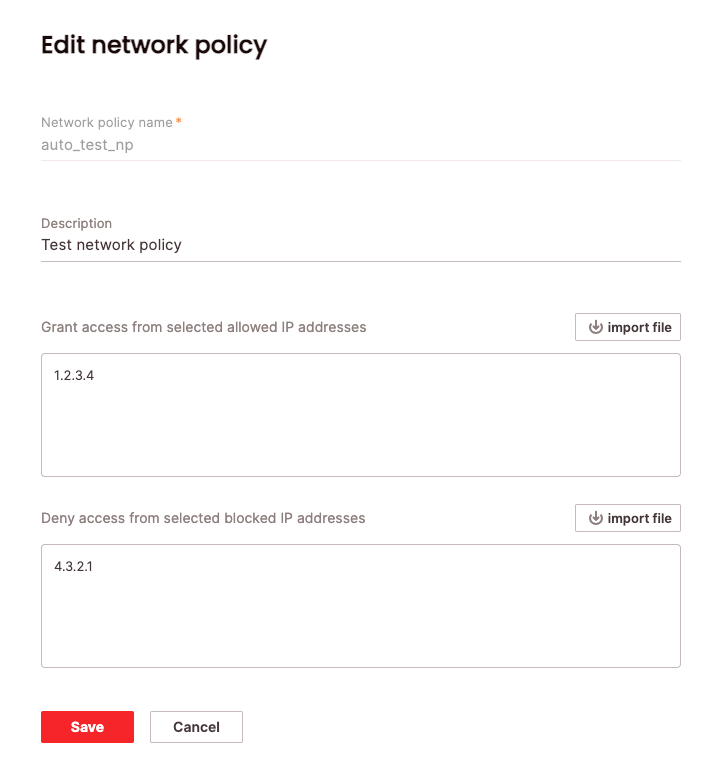
To edit a network policy via the UI:- Click Configure to open the configure space, then choose Network policies from the menu.
- Search for the relevant network policy using the top search filters or by scrolling through the list. Hover over the right-most column to make the network policy menu appear, then choose Edit network policy.
- From here you can edit description, allowed and blocked IP addresses and choose Save.
Delete a network policy
SQL
To delete a network policy using SQL, use the DROP NETWORK POLICY statement. For example:UI
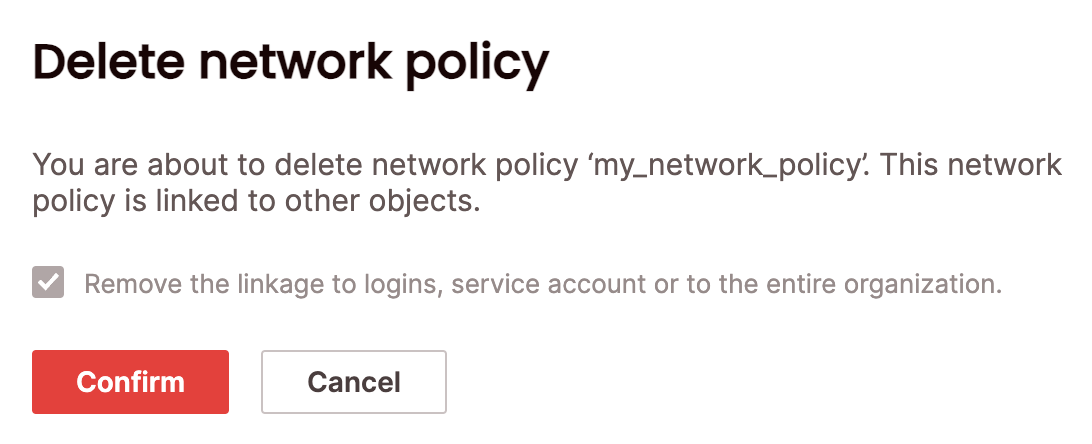
To delete a network policy via the UI:- Click Configure to open the configure space, then choose Network policies from the menu.
- Search for the relevant network policy using the top search filters or by scrolling through the list. Hover over the right-most column to make the network policy menu appear, then choose Delete network policy. You will need to confirm that you will also be removing links to the network policy by choosing Remove the linkage to logins, service accounts, or to the entire organization
- Choose Confirm.