> ## Documentation Index
> Fetch the complete documentation index at: https://docs.firebolt.io/llms.txt
> Use this file to discover all available pages before exploring further.
> Learn about user permissions and how to add and remove logins in a Firebolt account.
# Manage logins
Logins are managed at the organization level and are used for authentication. Logins are a combination of a login name (email), first name, last name, and password, unless you've configured [Single Sign-On (SSO)](/managed-service/security/sso). Moreover, logins can be configured with advanced authentication properties such as [MFA](/managed-service/security/enabling-mfa) and [network policies](/managed-service/security/network-policies). Logins are linked to users at the account level, so that roles may be managed separately per account. A user must be linked to either a login or a service account for programmatic use to gain access to Firebolt. You can add, edit or delete logins using SQL or in the UI.
To view all logins, click **Configure** to open the configure space, then choose **Logins** from the menu, or query the [information\_schema.logins](/reference-sql/information-schema/logins) view.
Managing logins requires the org\_admin role.
## Create a new login
### SQL
To create a login using SQL, use the [CREATE LOGIN](/reference-sql/commands/access-control/create-login) statement. For example:
```sql theme={"theme":{"light":"css-variables","dark":"css-variables"}}
CREATE LOGIN "alexs@acme.com" WITH FIRST_NAME = 'Alex' LAST_NAME = 'Summers';
```
### UI
To create a login via the UI:
1. Click **Configure** to open the configure space, then choose **Logins** from the menu:
 2. From the Logins management page, choose **Create Login**.
3. Enter the following details:
* First name: specifies the first name of the user for the login.
* Last name: specifies the last name of the user for the login.
* Login name: specifies the login in the form of an email address. This must be unique within your organization.
4. Optionally, you can:
* Associate a [network policy](/managed-service/security/network-policies) with the login by choosing a network policy name under the **Network policy attached** field.
* Enable password login, which specifies if the login can authenticate Firebolt using a password.
* Enable multi-factor authentication (MFA). Read more about how to configure MFA [here](/managed-service/security/enabling-mfa).
* Set the login as **organisation admin**, which enables fully managing the organization.
## Edit an existing login
### SQL
To edit an existing login using SQL, use the [ALTER LOGIN](/reference-sql/commands/access-control/alter-login) statement. For example:
```sql theme={"theme":{"light":"css-variables","dark":"css-variables"}}
ALTER LOGIN "alexs@acme.com" SET NETWORK_POLICY = my_network_policy
```
### UI
To edit a login via the UI:
1. Click **Configure** to open the configure space, then choose **Logins** from the menu.
2. Search for the relevant login using the top search filters, or by scrolling through the list of logins. Hover over the right-most column to make the login menu appear, then choose **Edit login details**.
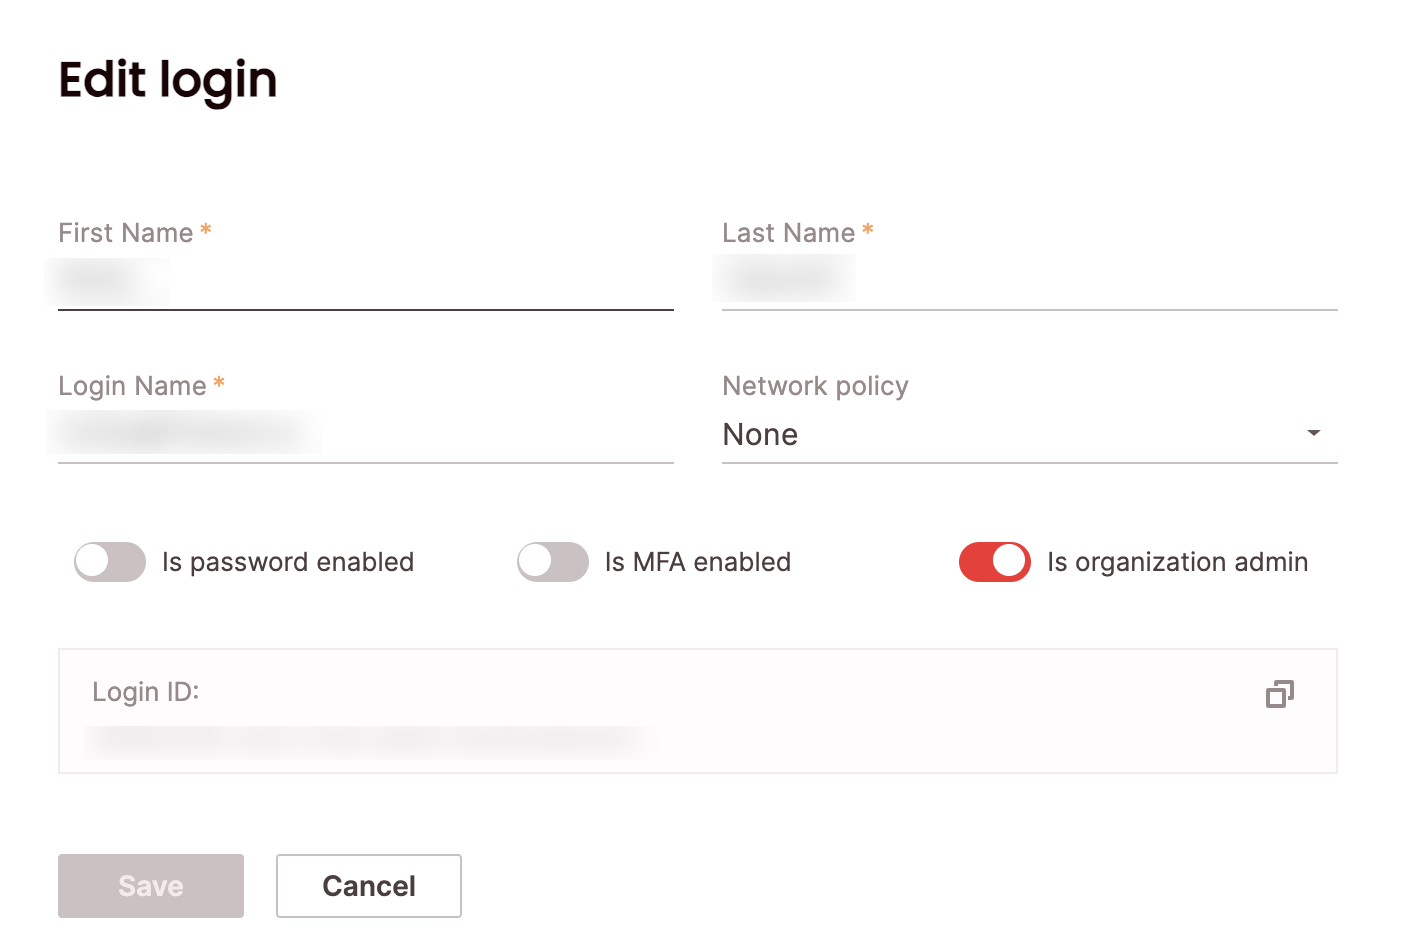
Edit the desired fields and choose **Save**.
Login name can not be changed for logins that were provisioned via SSO.
2. From the Logins management page, choose **Create Login**.
3. Enter the following details:
* First name: specifies the first name of the user for the login.
* Last name: specifies the last name of the user for the login.
* Login name: specifies the login in the form of an email address. This must be unique within your organization.
4. Optionally, you can:
* Associate a [network policy](/managed-service/security/network-policies) with the login by choosing a network policy name under the **Network policy attached** field.
* Enable password login, which specifies if the login can authenticate Firebolt using a password.
* Enable multi-factor authentication (MFA). Read more about how to configure MFA [here](/managed-service/security/enabling-mfa).
* Set the login as **organisation admin**, which enables fully managing the organization.
## Edit an existing login
### SQL
To edit an existing login using SQL, use the [ALTER LOGIN](/reference-sql/commands/access-control/alter-login) statement. For example:
```sql theme={"theme":{"light":"css-variables","dark":"css-variables"}}
ALTER LOGIN "alexs@acme.com" SET NETWORK_POLICY = my_network_policy
```
### UI
To edit a login via the UI:
1. Click **Configure** to open the configure space, then choose **Logins** from the menu.
2. Search for the relevant login using the top search filters, or by scrolling through the list of logins. Hover over the right-most column to make the login menu appear, then choose **Edit login details**.
Edit the desired fields and choose **Save**.
Login name can not be changed for logins that were provisioned via SSO.
 ## Deleting an existing login
### SQL
To delete an existing login using SQL, use the [DROP LOGIN](/reference-sql/commands/access-control/drop-login) statement. For example:
```sql theme={"theme":{"light":"css-variables","dark":"css-variables"}}
DROP LOGIN "alexs@acme.com";
```
### UI
To delete a login via the UI:
1. Click **Configure** to open the configure space, then choose **Logins** from the menu.
2. Search for the relevant login using the top search filters, or by scrolling through the logins list. Hover over the right-most column to make the login menu appear, then choose **Delete login**.
If the login is linked to any users, deletion will not be permitted. The login must be unlinked from all users before deletion.
## Deleting an existing login
### SQL
To delete an existing login using SQL, use the [DROP LOGIN](/reference-sql/commands/access-control/drop-login) statement. For example:
```sql theme={"theme":{"light":"css-variables","dark":"css-variables"}}
DROP LOGIN "alexs@acme.com";
```
### UI
To delete a login via the UI:
1. Click **Configure** to open the configure space, then choose **Logins** from the menu.
2. Search for the relevant login using the top search filters, or by scrolling through the logins list. Hover over the right-most column to make the login menu appear, then choose **Delete login**.
If the login is linked to any users, deletion will not be permitted. The login must be unlinked from all users before deletion.