> ## Documentation Index
> Fetch the complete documentation index at: https://docs.firebolt.io/llms.txt
> Use this file to discover all available pages before exploring further.
> Understand how to create security credentials in AWS
# Creating Access Key and Secret ID in AWS
This section will walk you through the steps to create security credentials in AWS. These credentials will be used to load data from AWS S3 into Firebolt.
In order to enable Firebolt to load data from your S3 buckets, you must:
1. Create a user.
2. Create appropriate permissions for this user.
3. Create access credentials to authenticate this user.
## Create a user
1. Log into your AWS Management console and go to the IAM section. You can do this by typing "IAM" in the search bar.
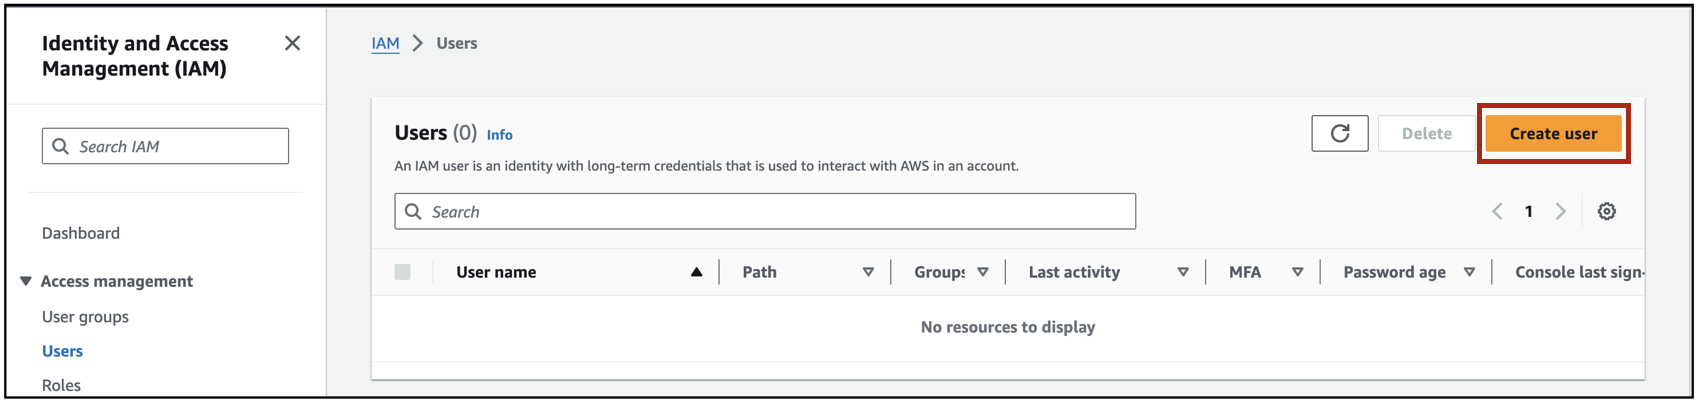
2. Once you are in the IAM section, select the **Create User** button.
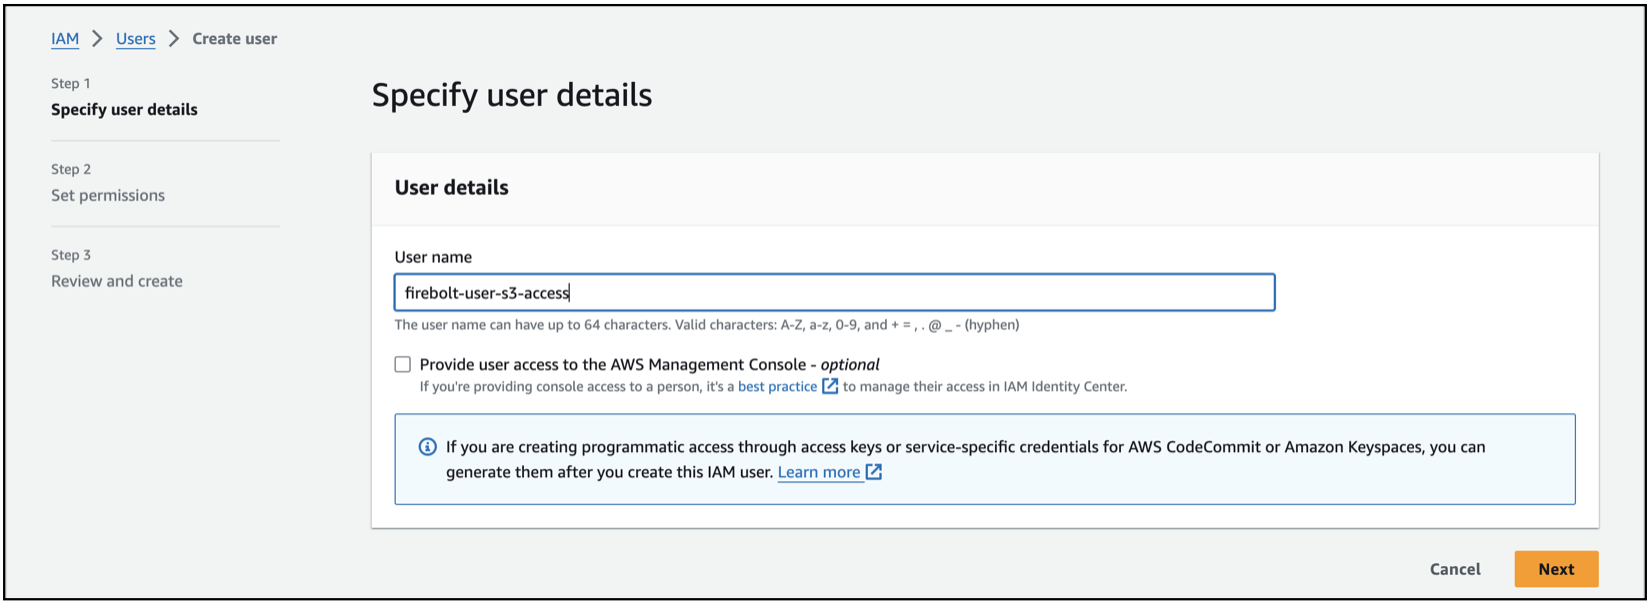
 3. Enter a name for the user and select **Next**.
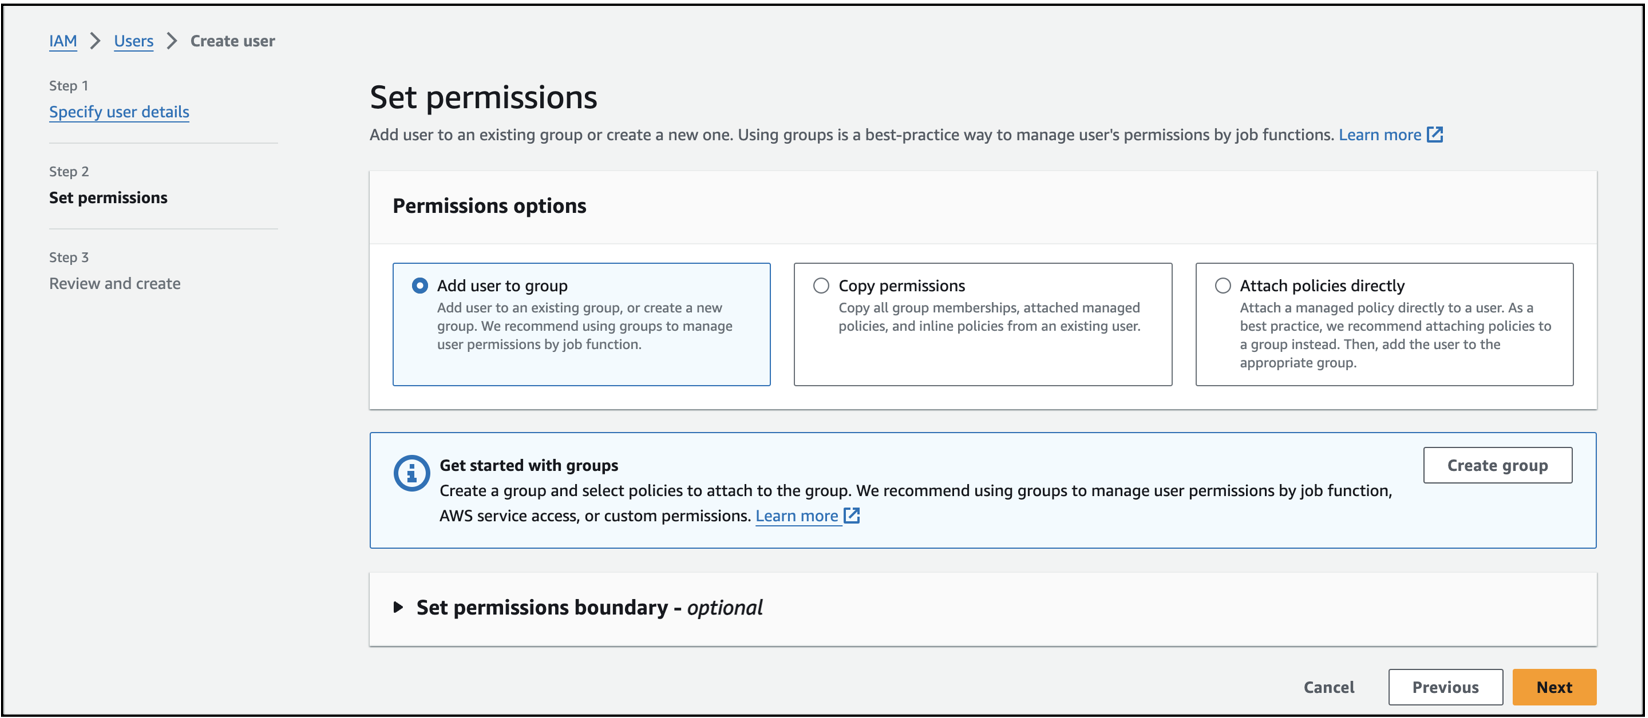
 4. You can have the default permission option set to **Add user to group** and select **Next**.
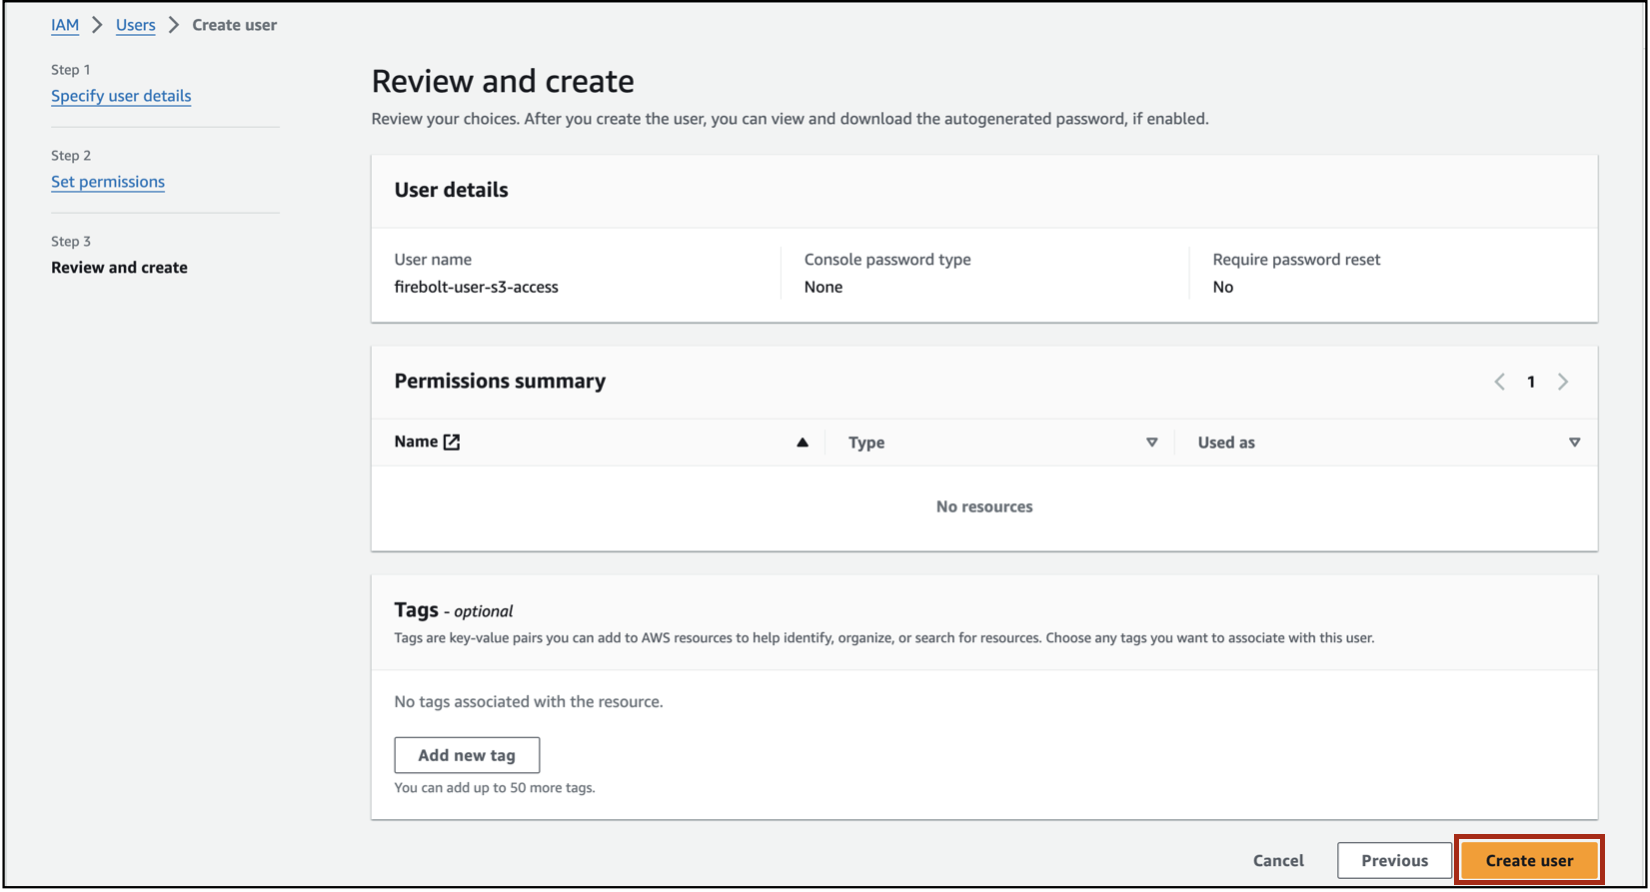
 5. Select **Create User**.
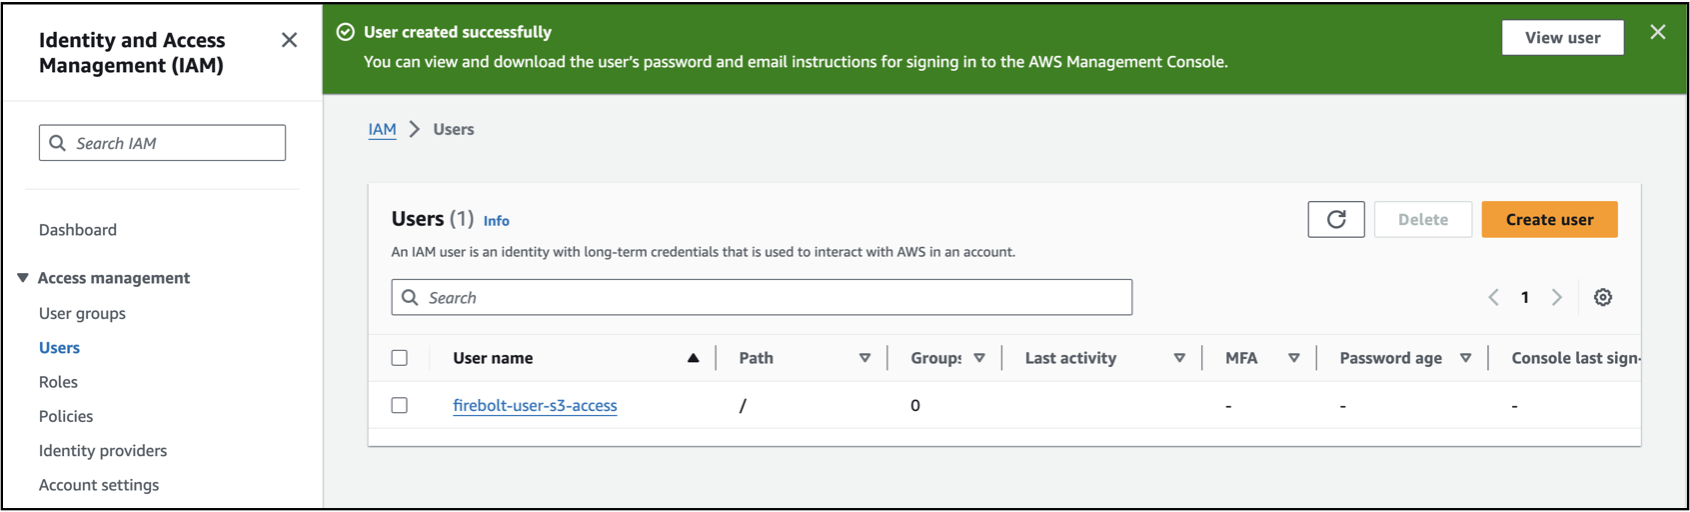
 6. You will see a message **User created successfully**.
 ## Create S3 access permissions
Now that you have created the user, you will now assign this user appropriate permissions for S3.
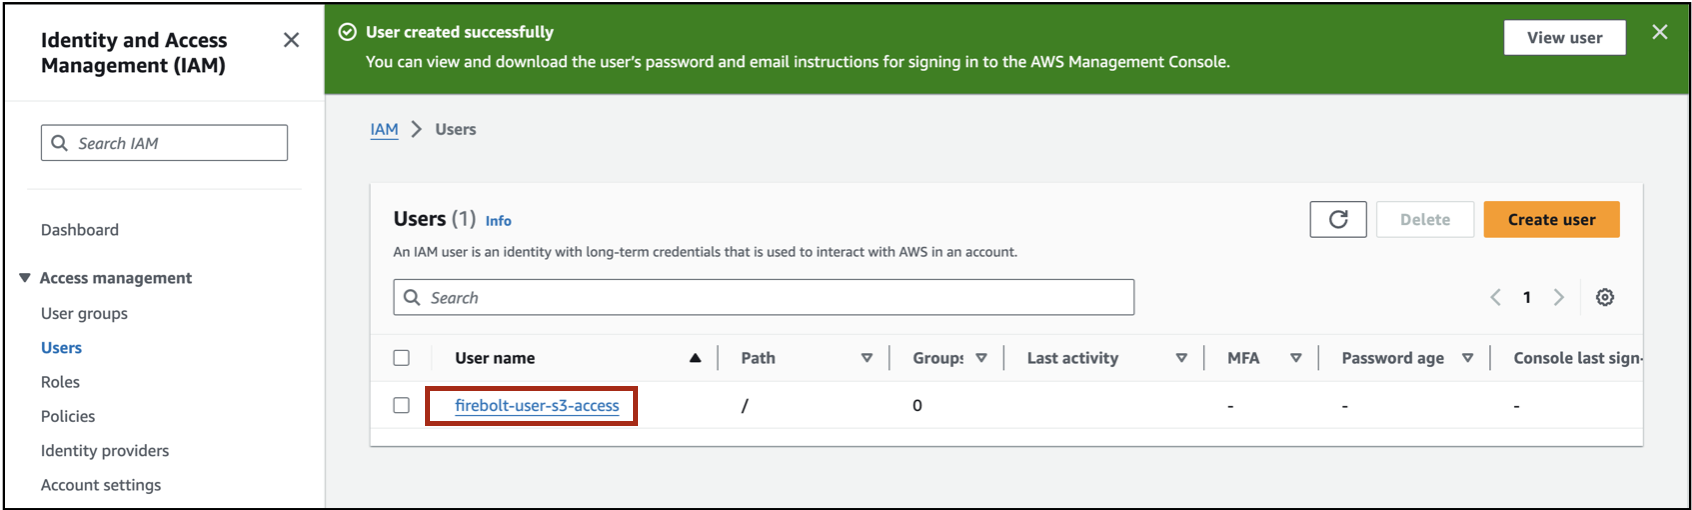
1. Select on the user name as shown below.
## Create S3 access permissions
Now that you have created the user, you will now assign this user appropriate permissions for S3.
1. Select on the user name as shown below.
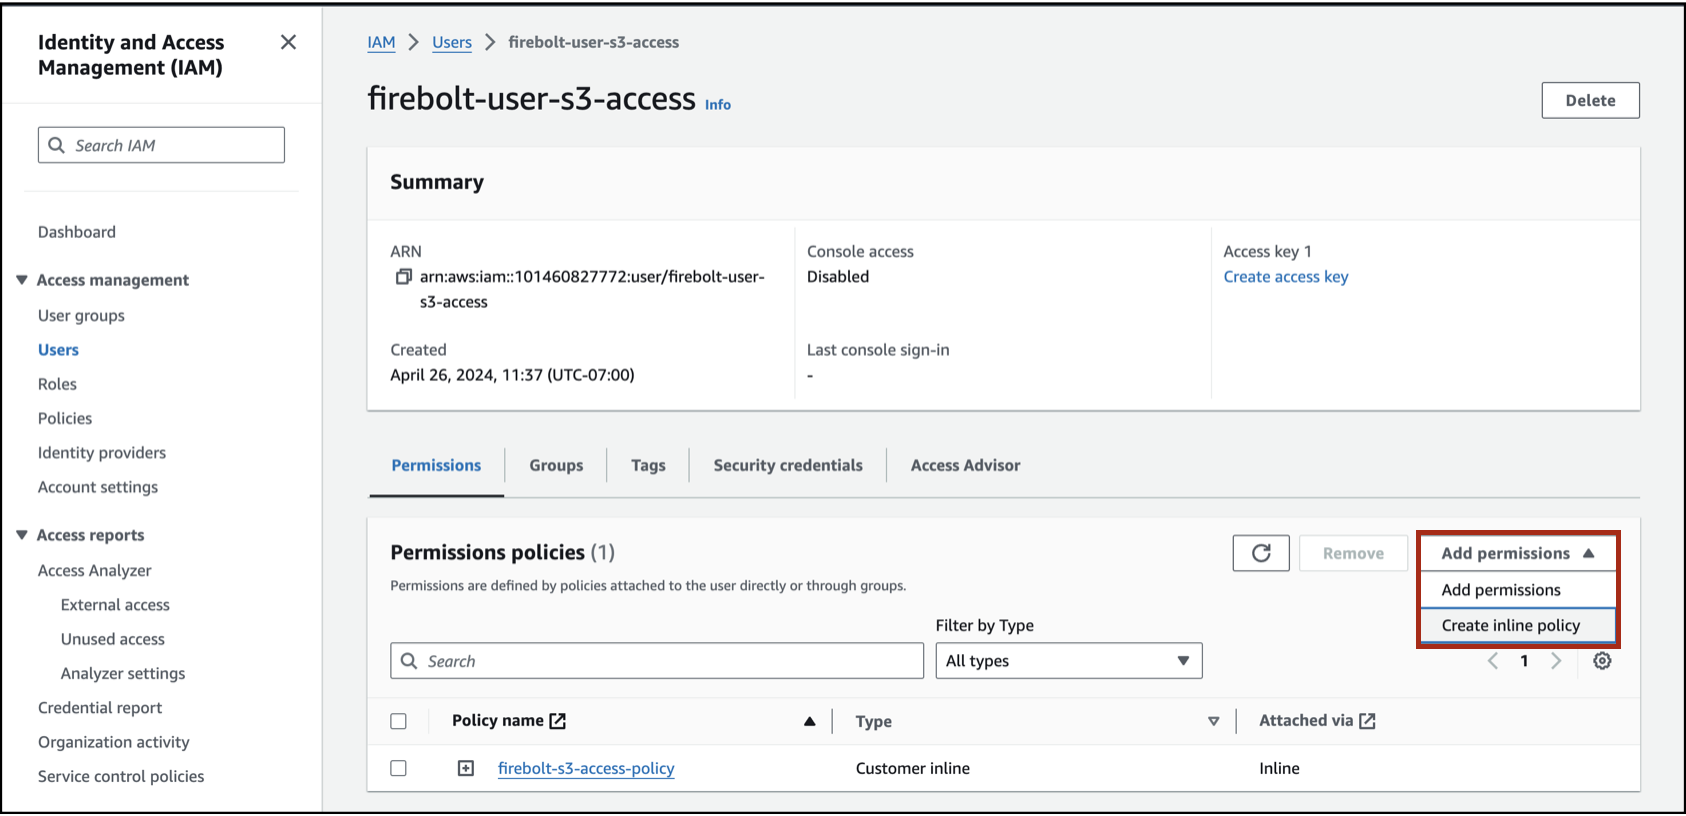
 2. In the Permissions tab, select the **Add Permissions** drop-down and choose **Create inline policy**.
 3. In **Specify Permissions** choose S3 as the service.
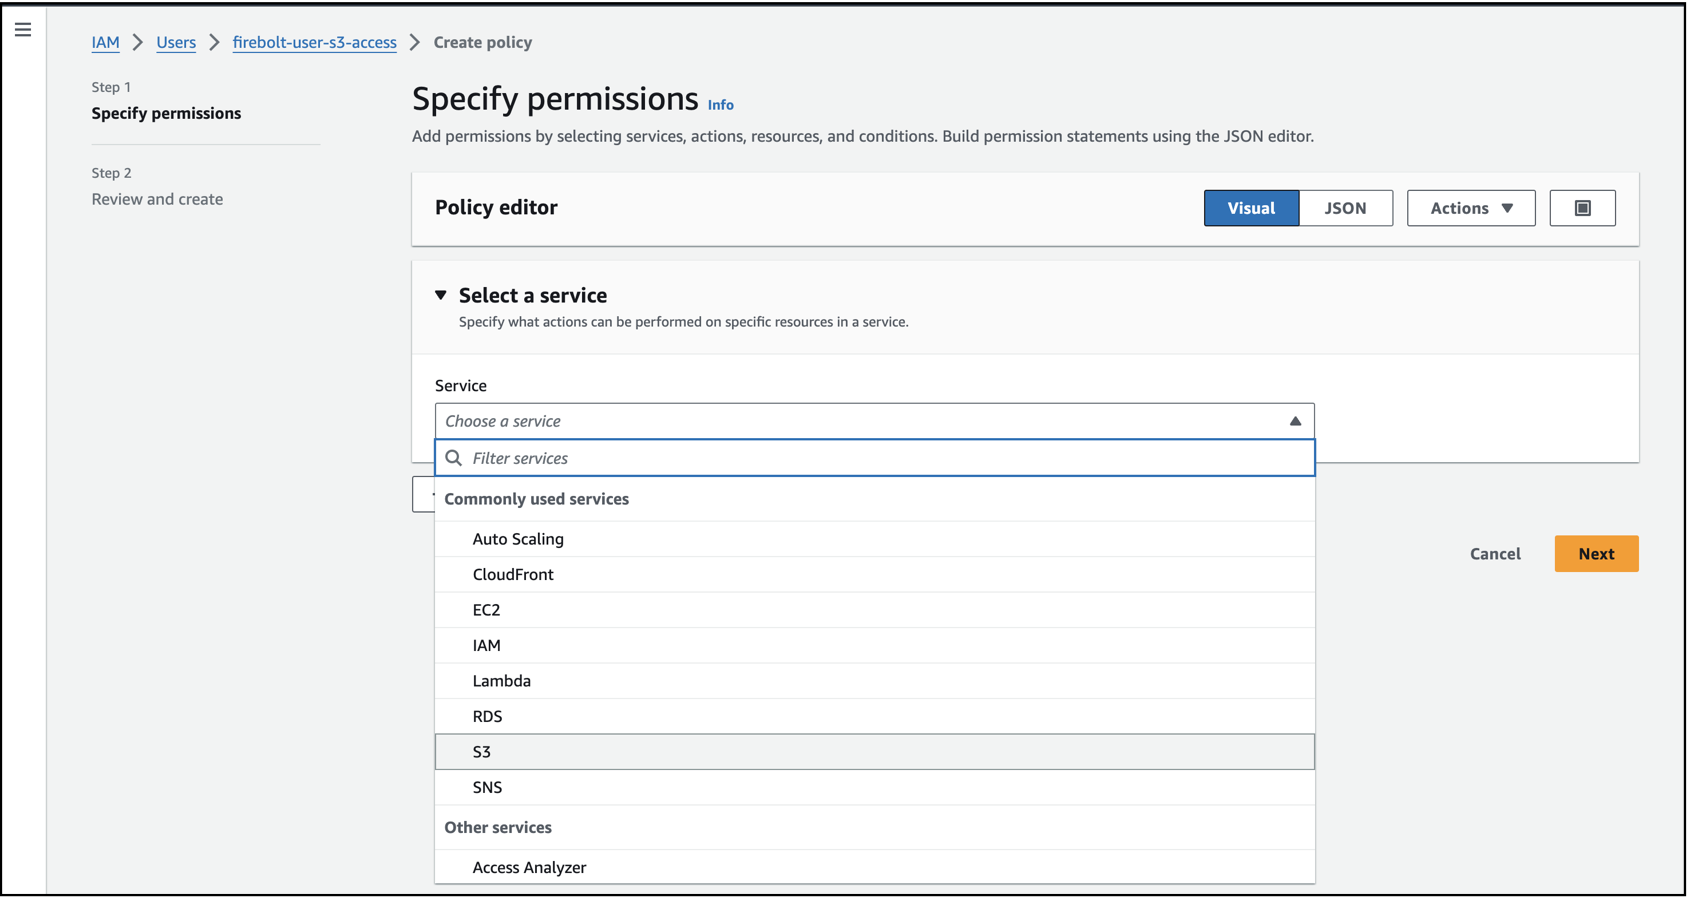 4. Choose **JSON**, paste the following JSON code in the policy editor, and select **Next**.
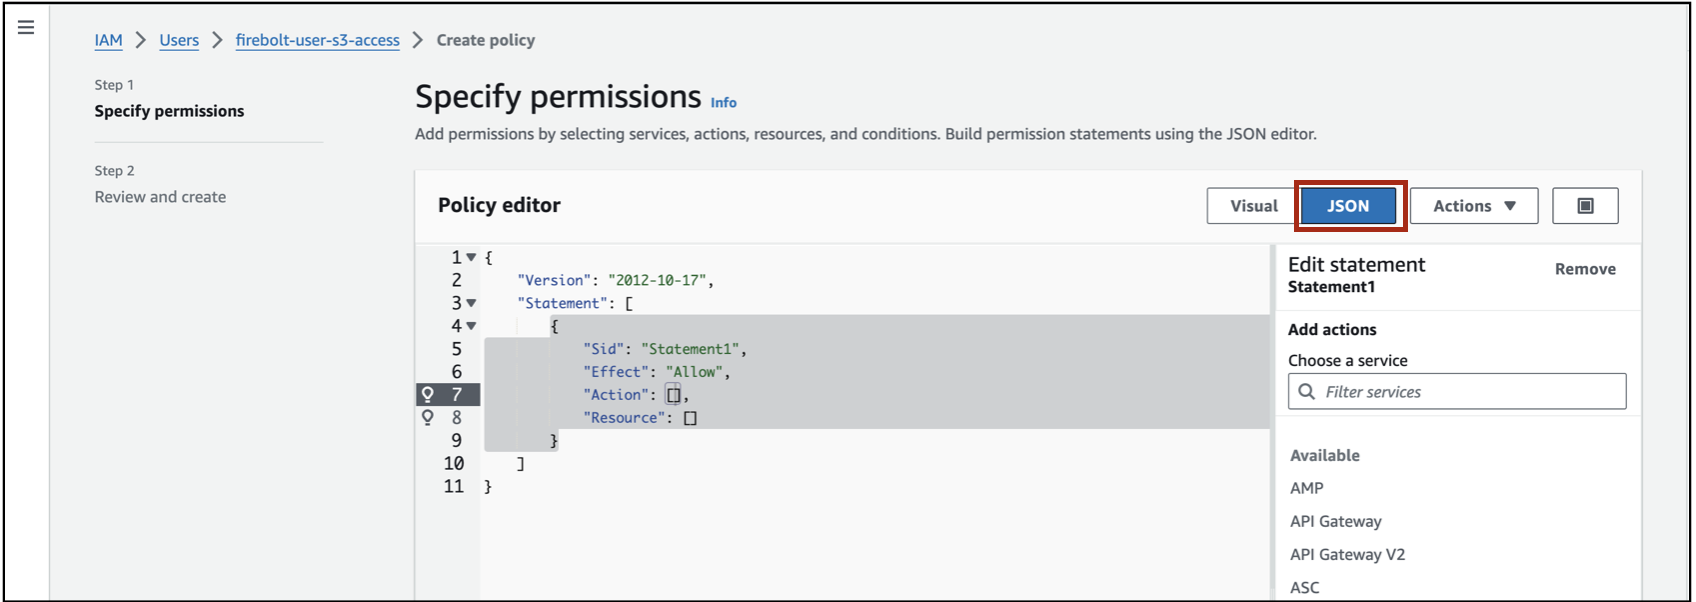 ```json theme={"theme":{"light":"css-variables","dark":"css-variables"}}
{
"Version": "2012-10-17",
"Statement": [
{
"Effect": "Allow",
"Action": [
"s3:GetObject",
"s3:GetObjectVersion"
],
"Resource": "arn:aws:s3::://*"
},
{
"Effect": "Allow",
"Action": "s3:PutObject",
"Resource": "arn:aws:s3:::/*"
},
{
"Effect": "Allow",
"Action": "s3:ListBucket",
"Resource": "arn:aws:s3:::",
"Condition": {
"StringLike": {
"s3:prefix": [
"/*"
]
}
}
}
]
}
```
The `s3:PutObject` permission block above is optional and may be omitted if your use case doesn't require writing objects to S3.
**IMPORTANT:** Replace `` with the S3 bucket that you want to provide access to.
5. Enter a description for the policy and select **Create Policy**.
```json theme={"theme":{"light":"css-variables","dark":"css-variables"}}
{
"Version": "2012-10-17",
"Statement": [
{
"Effect": "Allow",
"Action": [
"s3:GetObject",
"s3:GetObjectVersion"
],
"Resource": "arn:aws:s3::://*"
},
{
"Effect": "Allow",
"Action": "s3:PutObject",
"Resource": "arn:aws:s3:::/*"
},
{
"Effect": "Allow",
"Action": "s3:ListBucket",
"Resource": "arn:aws:s3:::",
"Condition": {
"StringLike": {
"s3:prefix": [
"/*"
]
}
}
}
]
}
```
The `s3:PutObject` permission block above is optional and may be omitted if your use case doesn't require writing objects to S3.
**IMPORTANT:** Replace `` with the S3 bucket that you want to provide access to.
5. Enter a description for the policy and select **Create Policy**.
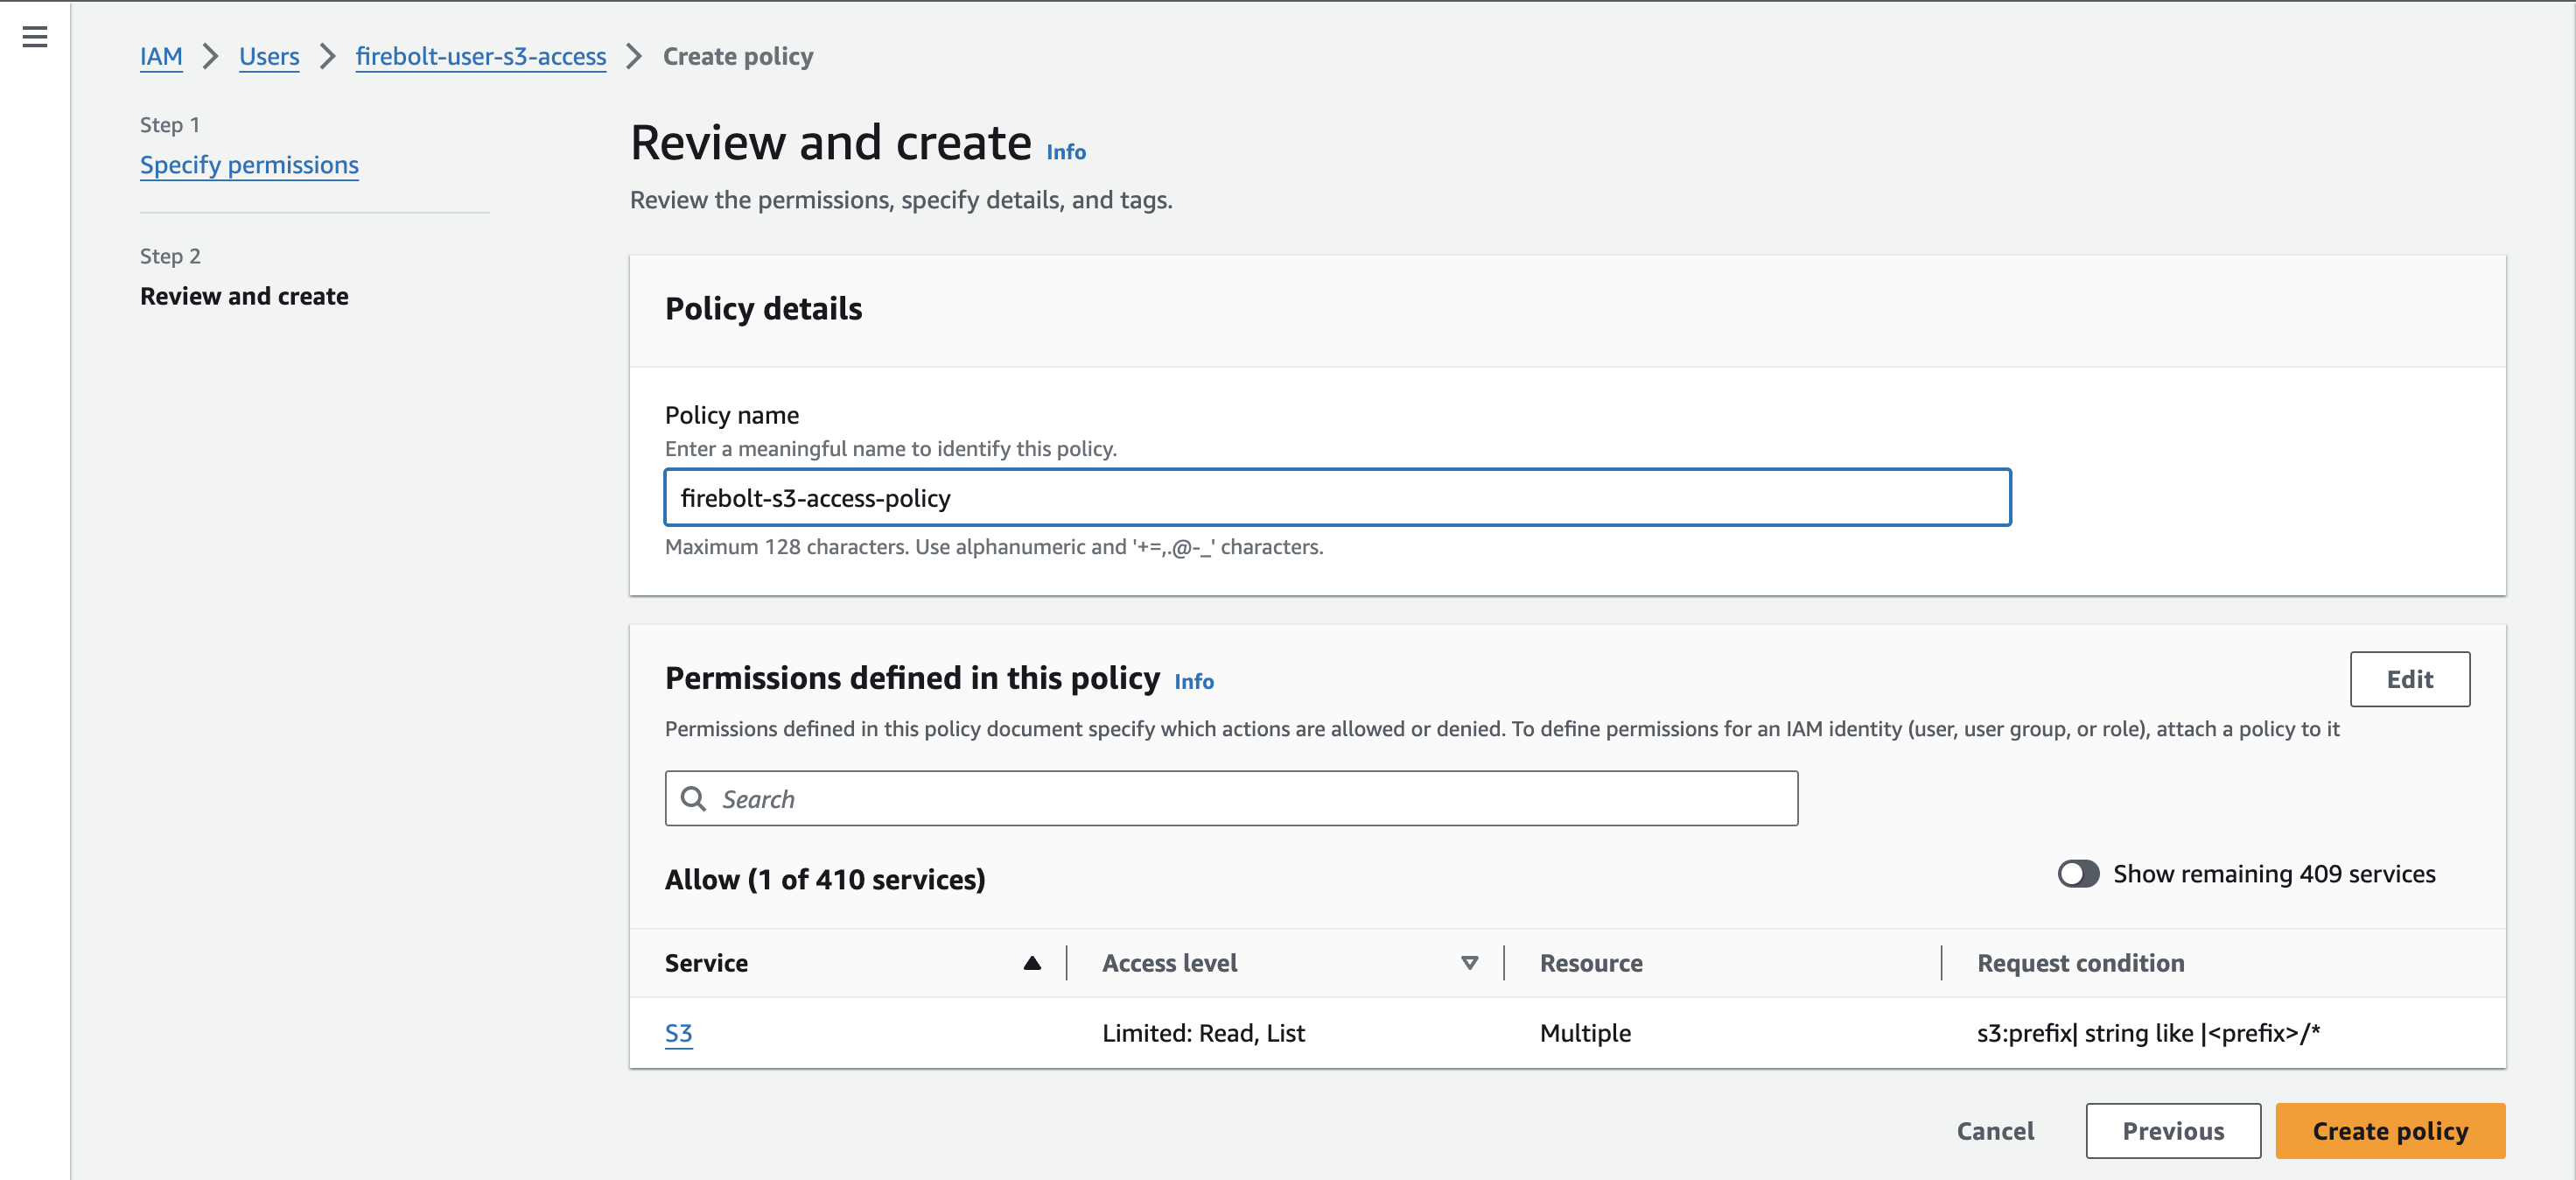 6. You will see a message that the policy has been successfully created.
## Create access key and secret ID
Now that you have created a user, authorized the user with the appropriate S3 permissions, you will create access credentials for this user. These credentials will be used to authenticate the user.
1. Select the **Security Credentials** tab, as shown in the following image:
6. You will see a message that the policy has been successfully created.
## Create access key and secret ID
Now that you have created a user, authorized the user with the appropriate S3 permissions, you will create access credentials for this user. These credentials will be used to authenticate the user.
1. Select the **Security Credentials** tab, as shown in the following image:
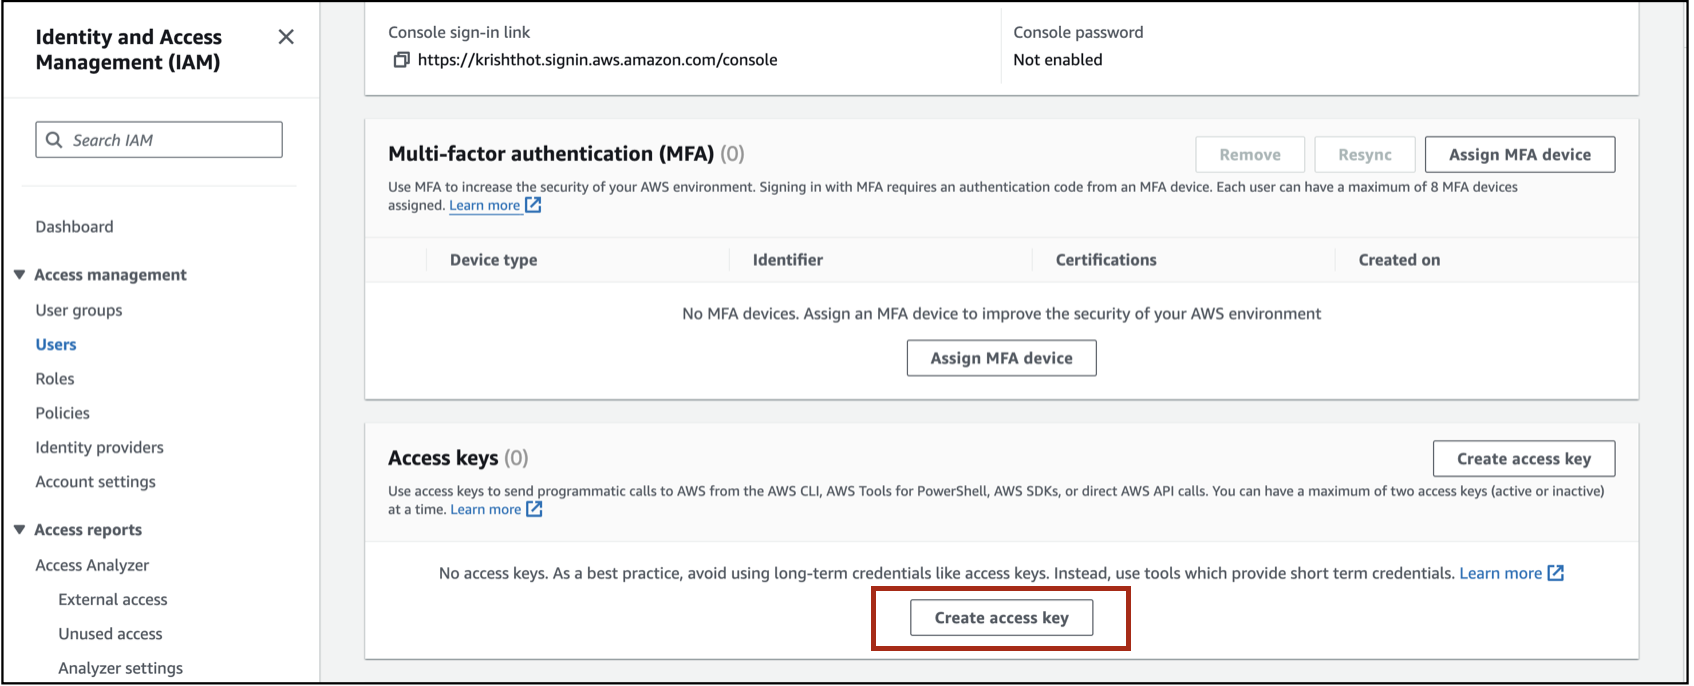
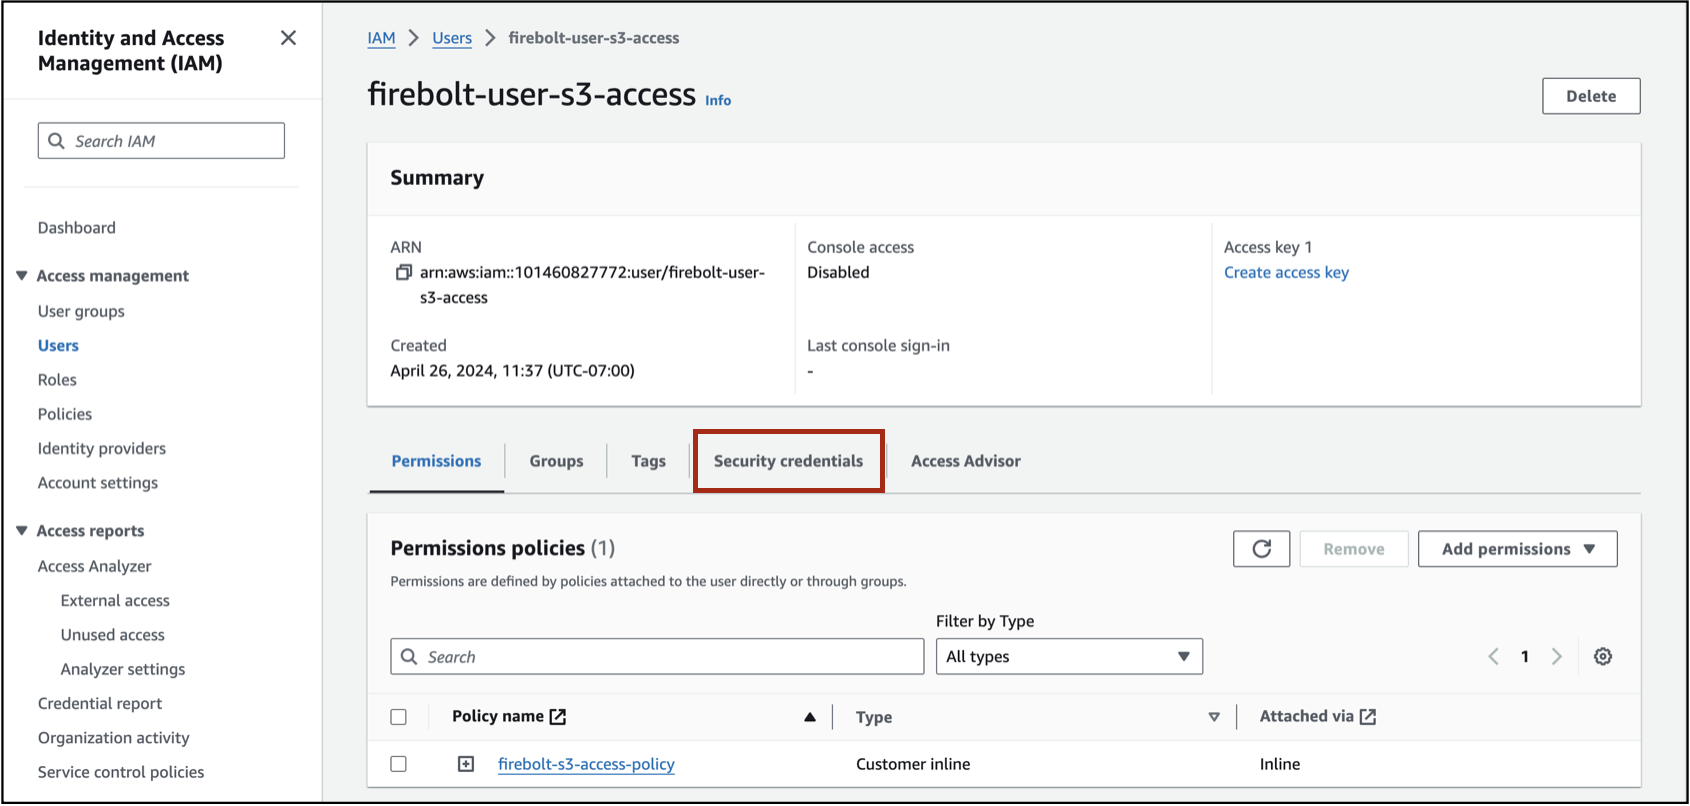 2. In the **Access Keys** section, select the **Create Access Key** button.
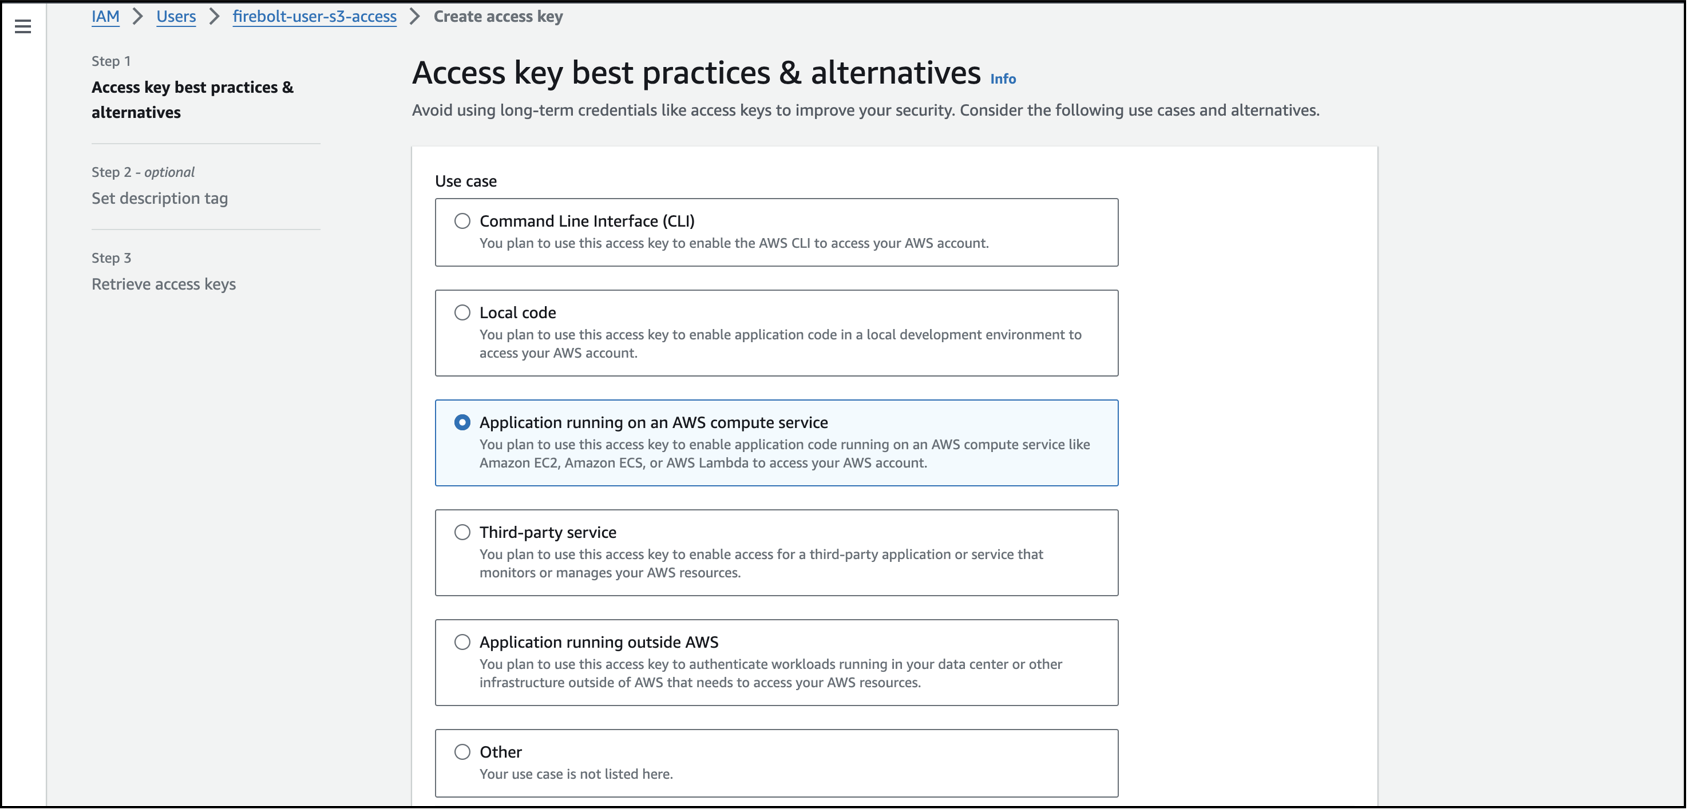
 3. For the use case, choose the **Application running on AWS compute service**. You will see an alternative recommendation. You can check the box that says "I understand the above recommendation and want to proceed to create an access key" and select **Next**.
 4. Set a description tag for the access key and select \*\*C,
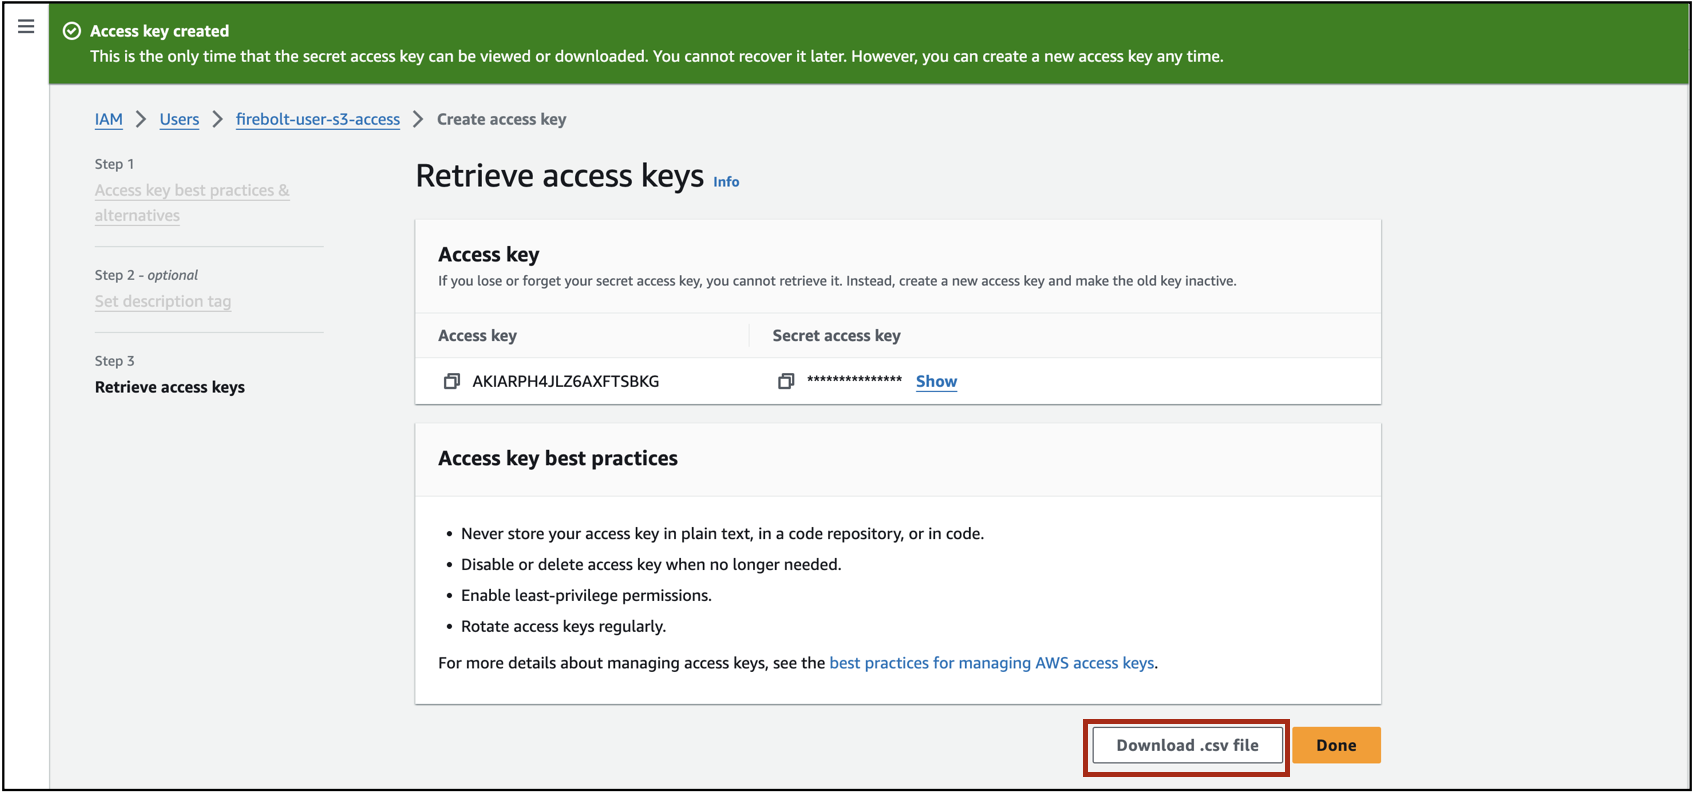
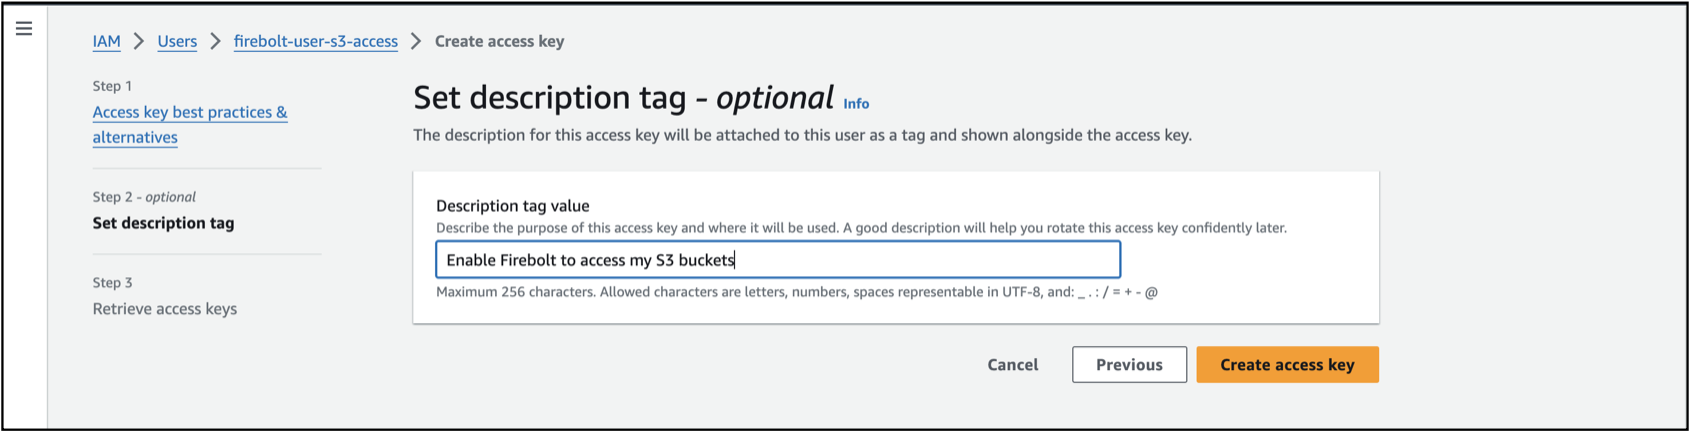 5. You will see a message indicating that the access key was created. Make sure to download the access key. You will need these credentials when you load S3 data into Firebolt.